Pages

Monday, December 23, 2024

Glittered Snowflake

I have several snowflake stencils, and I don't think I have used them all!  I thought that I would mass produce several cards using the Snowflake Mandala stencil and glitter texture paste.  But I only had enough of the glitter paste to make one card!

I used the following for the card:

  • Gina K Designs - Snowflake Mandala Stencil
  • Gina K Designs - Lipstick, Red Hot, Red Velvet Inks
  • Gina K Designs - Holiday Floral Poly-Glaze and Dies
  • Gina K Designs - 14 Carat Gold Foil
  • Gina K Designs - Master Layouts 1
  • Vicki Boutin - Iridescent Glitter Texture Paste
To make the card, I stenciled the image using the red inks with the darkest in the center of the snowflake. The Glitter Paste was added over the inked image.  Once dry, the image and associated mat were cut with Master Layouts 1 and added to the card base.  The sentiment was foiled using 14 Carat Gold Foil and die cut. The sentiment was then added to complete the card. 
Saturday, December 21, 2024

Christmas Bows

I've always liked the Ton Stamps stencils and layering stamps.  I finally bought the Grouped Grand Bows and associated die a few years ago. But buying it and using it are two separate things! Well this year, I finally used the stamp and die!


 I used the following for the card:

  • The Ton Stamps - Grouped Grand Bows and associated Die
  • Gina K Designs - Lipstick, Red Velvet, Applemint, Christmas Pine, Powder Blue, Blue Denim, Lemon Drop, Prickly Pear Ink
  • Gina K Designs - Holiday Greeting Sentiment Sheet
  • Gina K Designs - Radiant Red Foil
To make the card, I stamped the images and die cut them.  The sentiment was foiled using the Radiant Red Foil. The images were added to the card base. The sentiment was added between the bows to complete the card.

Monday, December 16, 2024

Modern Poinsettia

For these cards, I used the Modern Poinsettia Stencil.  I found that I was able to cut these so that I was able to make 2 mini-slimline cards from one stenciled image!  


 I used the following for the cards:

  • Gina K Designs - Modern Poinsettia Stencil
  • Gina K Designs - Red Hot, Cheery Red, Christmas Pine Inks
  • Altenew - Ultimate Metallic Gold Ink
  • Gina K Designs - Holiday Floral Poly Glaze Sheets and Dies
  • Gina K Designs - 14 Carat Gold Foil
  • Gina K Designs - Master Layouts 1 and 7
To make the cards, I stenciled the image on a 6 x 6 piece of paper.  The image and associated mats were cut from Master Layouts 7 (and a one done from ML 1).  These were added to the card base.  The sentiments were foiled with 14 carat gold foil, and die cut using the associated dies.  The sentiments were then added to the card base to complete the card.

Friday, December 13, 2024

Holiday Floral Poinsettia

The Holiday Floral set contains the usual stamps and dies.  But there is also stencils and poly-glaze sheets.  The stencils to color the images and the poly-glaze so the outlines can be foiled;  For these cards, I used the poly-glaze, stencils and dies.  I love the way the cards came out!


 I used the following for the cards:

  • Gina K Designs - Holiday Floral Poly-Glaze, Stencils and Dies
  • Gina K Designs - Lipstick, Bubblegum, Grass Green, Medium Spruce and Red Hot Inks
  • Gina K Designs - 14 Carat Fancy Foil
  • Gina K Designs - Master Layouts 1, Small and Large Oval Dies
  • Gina K Designs - Poly-Glaze sheets
To make the card, I first foiled the images from the poly-glaze sheets.  The sentiments were also foiled.
(I used the left over foil from the sentiments and the plain poly-glaze sheets to foil as well).  Using the stencils the images were colored.  The sentiments and images were cut with the associated dies.  Master Layouts 1 was used to cut the white panel and mat.  These were then added to the card base.  The small and large ovals were used to cut the white panel and the associated mat.  These were then added to the card base.  The floral image and sentiment were then added to complete the card.

Saturday, December 7, 2024

Snowflake Christmas Cards.

I love the way these cards came out!  The brilliance and shininess just doesn't photograph well. These cards are SO pretty in real life. The Poly-glaze sheets from Gina K Designs makes using the left over foil a breeze! 


For these cards I used:
  • Creative Vision Stamps - Foilables
  • Gina K Designs - Poly-glaze Sheets
  • Gina K Designs - Radiant Red and Brilliant Blues Fancy Foils
  • Gina K Designs - Holiday Greetings Sentiment Sheets
To make the cards, I foiled the Sentiment Sheets, and the Foilables with the Red and Blue Fancy Foils.  I foiled using the leftover foil and the poly-glaze sheets, leaving no waste.  The foiled snowflake backgrounds were added to card bases. The sentiments were then trimmed and added to the cards.


Monday, November 25, 2024

Dahlia Birthday Card.

For this card, I combined products from Gina K and The Ton.  The Ton has gorgeous layering stencils and stamps. The Dahlia is from the Ton, while the inks and background are Gina K.  Both go together so well!


For this card I used:

  • Gina K Designs - Ink - Fresh Asparagus, Grass Green, Light Medium and Dark Carnation
  • Gina K Designs - Petite Flourish Foil-Mates
  • Gina K Designs - Birthday Bubble Sentiment Sheets
  • Therm-O-Web - Deco Foil - Champagne
  • The Ton - Climbing Dahlias Layering Stencil and Die
To make the card, the Dahlia was stenciled using the Gina K Inks.  The image was then cut using the associated die.  The background image - Petite Flourish - was foiled using the Champagne foil.  The same foil was used for the sentiment.  The background image was trimmed, matted with black cardstock and added to a card base.  The Dahlia was added using foam tape,  The sentiment strip was then added using more foam tape to complete the card.

Monday, November 18, 2024

A Cricut card for a 2 year old.

I kept this card simple - its for a 2 year old!  I made sure the papers I used were colorful to grab attention.  All images and text are from Cricut Design Space.


Monday, September 30, 2024

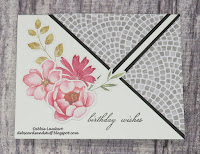
Lovely Flowers Birthday Card

So I finally used the Lovely Flowers stamps, dies and stencils.  I've been wanting to use this set for a while, and now I want to make more cards with it!  Here is the card I made:

I used the following for the card:

  • Gina K Designs - Lovely Flowers - stamps, dies and stencil
  • Gina K Designs - Cobblestone stencil
  • Gina K Designs - Master Layouts 1
  • Gina K Designs - Grass Green, Fresh Asparagus, Light Spruce, Medium Spruce, Peach Bellini, Tangerine Twist, Soft Stone inks
  • Versamark
  • Stampendous - Detail Gold Embossing Powder
To make the card, I stamped the flower and sentiment images in Versamark, added the embossing powder and heat set.  Each of these was then cut using the corresponding dies.  The flower image was colored using the associated stencils, blending brushes and ink.  White cardstock was cut using Master Layouts 1, along with a mat.  The white cardstock was lightly stenciled using the Cobblestone stencil and Soft Stone ink. The card was then assembled, the mat added to the card base, followed by the cobblestone stenciled image, the flowers and the sentiment.
 

Monday, September 23, 2024

Lighthouse BIrthday Card

I love lighthouses.  I purchase stamps and dies that contain lighthouses.  So of course, when I saw the Hero Arts June 2023 kit I had to get it.  I also purchased the lighthouse die window die.  And here is a birthday card made with the kit and die:

I use the following for the card:

  • Hero Arts June 2023 Kit 
  • Hero Arts - Lighthouse Window Fancy Die
  • Gina K - Black Onyx, Powder Blue, Wild Dandelion, Ocean Mist, Turquoise Sea Inks
  • Simon Says Stamp - Clouds for Days Stencil
To make the card, I stamped the sun, water and birds using the stamps from the Hero Arts 2023 Kit.  The clouds were stenciled above the water line.  The Lighthouse Window die was used to cut a piece of black cardstock.  The image was then placed behind this piece, and the sentiment added.  The entire piece was added to an A2 card base to complete the card.


Thursday, September 12, 2024

Sunflower Anniversary

An anniversary card for someone who loves sunflowers!


For this card I used:

  • Gina K Designs - Blooming Sunflower Stamp set and dies
  • Gina K Designs - Gauze Background Stamp
  • Gina K Designs - Large and Small Stitched Oval dies, Master Layouts 2
  • Lawn Fawn - Walnut Ink
  • Wow - Gold Pearl Embossing Power
  • Versmark
  • Zig Clean Color Real Brush - various colors
  • Clearly Besotted - Tiny Type Stamp set
To make the card, the sunflower image was stamped with Versamark, embossing powder added and heat set.  The image was cut out with the coordinating die and colored with the Zig Clean Color Real Brush markers.  The background was stamped using the Gauze stamp and walnut ink. This was then cut using Master Layouts 2, along with the associated mat.  The two ovals were cut using the Stitched ovals dies.  The sentiment was stamped on the smaller oval using Versamark, embossing power added and heat set.  The card was then assembled, the background mat added to the card base, followed by the stamped gauze image, the large oval, the small oval and finally the sunflower image was added to complete the card.

Monday, August 12, 2024

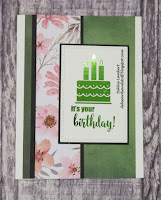
15 cards with Kendra's Card Challenge #15

For Kendra's Card Challenge #15, I decided that I wanted to use patterned paper that was unlike what I usually use.  I wanted something bright, so I chose Pink & Main Bright Botanicals for the patterned paper.  One thing I really liked was that it was double sided, so I had a choice which pattern to use.

Here are the 15 cards:

Here are the individual cards, and what I used for each card:

Card 1:

  • Gina K Designs - Blue Denim, Blue Raspberry, Powder Blue, Ocean Mist Inks
  • Gina K Designs - Scripty Sayings 2 Stamp set
  • Gina K Designs - Modern Floral Stamps, Dies and Stencils

Card 2:

  • Gina K Designs - Grass Green, Kraft Inks
  • Gina K Designs - Woodland Friends Stamp set
  • Prisma Color Pencils and Gamsol
  • Clearly Besotted - Tiny Type Stamp set
  • Hero Arts - Infinity Circle Dies

Card 3: 

  • Gina K Designs - Black Onyx Ink
  • Gina K Designs - Vintage Summer Stamp set
  • Gina K Designs - Large and Small Stitched Oval Dies
  • Prisma Color Pencils
  • Picket Fence Studios - Words to Say Happy Anniversary
Card 4:
  • Gina K Designs - Wild Dandelion, Passionate Pink Inks
  • Gina K Designs - Summer Silhouette Stamp set
  • Gina K Designs - Daisies Forever Layering Stencil Bundle
Card 5: 
  • Gina K Designs - Blue Denim, Soft Stone, Lemon Drop, Wild Dandelion Inks
  • Gina K Designs - Ocean Silhouettes, Pocket Full of Sunshine Stamp sets
  • Gina K Designs - At the Beach Dies

Card 6:

  • Gina K Designs - Black Onyx Ink
  • Lawn Fawn - Scripty Sayings Stamp set
  • Hero Arts - Infinity Circle Dies
  • Hero Arts - Beautiful Butterflies Stamps and Dies
  • Copic Markers
  • Wink of Stella - Clear
Card 7:
  • Gina K Designs - Blue Denim Ink
  • Gina K Designs - Grateful Greenery Mini Stamp set
  • Gina K Designs - Petit Flourish Embossing Folder
  • Spellbinders - Standard Large Circle and Classic Large Scalloped Circle Dies
  • Lawn Fawn - Valentine Borders
Card 8:
  • Gina K Designs - Blue Denim Ink
  • Gina K Designs - The Best Flowers
  • Gina K Designs - Happy and Shadow Dies
Card 9:
  • Gina K Designs - Black Onyx, Wild Dandelion, Tangerine Twist, Dusty Rose Inks
  • Gina K Designs - The Wetlands 2 Stamp set
  • Gina K Designs -  Elegant Asters Stamp and die set
Card 10:
  • Gina K Designs - Black Onyx, Wild Dandelion Inks
  • Gina K Designs - Birthday Blessings Stamp set
  • Clearly Besotted - Tiny Type Stamp Set
Card 11:
  • Gina K Designs - Happy and Shadow Dies
  • Hero Arts - Forest Ink
  • Honey Bee Stamps - Inside Birthday Stamp set
Card 12:
  • Gina K Designs - Blue Denim Ink
  • Altenew - Vintage Roses
Card 13:
  • Gina K Designs - Blue Denim Ink
  • Gina K Designs - Master Layouts 4
  • Hero Arts - Infinity Circle Dies
  • Clearly Besotted - Tiny Type
Card 14:
  • Gina K Designs - Happy Birthday Trio
Cad 15:
  • Gina K Designs - Black Onyx Ink
  • Waffle Flower - Happy Anniversary Stamp Set
  • Hero Arts - Infinity Circle Dies
  • Image from Cricut Access (Glasses)

Friday, July 26, 2024

Mini Slimline Birthday Card.

For a while, I've had an idea of a card I wanted to make.  When I got Master Layouts 15 from Gina K and associated Filler stencil, I knew I had all of the pieces to make the card!


 I used the following for the card:

  • Gina K Designs - Master Layouts 7, Master Layouts 15, Master Layouts 15 Filler Stencil
  • Gina K Designs - Fresh Asparagus, Light Lilac, Medium Lilac Inks
  • Gina K Designs - Bold Blooms (sentiment), Take Card (flowers) Stamp sets
  • Gina K Designs - Wild Wisteria paper

To make the card, I cut the three postage stamps and associated mat from Master Layouts 15.  Then using the stencil, I lightly added Light Lilac ink using a blender brush.  The flowers were then stamped using Medium Lilac Ink, and the stems and leaves stamped using Fresh Asparagus.  The three postage stamp die cut was added to the mat.  Master Layouts 7 was then used to cut the next layers.  These were added to the card base, and on top the postage stamp images.  The sentiment was added to complete the card.

Friday, July 19, 2024

Using leftover foil for another Birthday Card!

I had to use the leftover foil from a card I made a few weeks back,  Since the foil could be added to black toner sheets, I did that to make the background of this card.  (Now I just need to learn how to take a picture of a foiled card without getting a reflection in the foil!)


I used the following for the card:
  • Gina K Designs - Wetlands 2 Stamp set
  • Gina K Designs - Master Layouts 1
  • Wink of Stella - Gold
  • MFT - Black Licorice Ink
  • Therm-o-web - Gold leftover foil from foiling the Gina K Thick Brush Stencil-Mate

To make the card, I added the foil to the Black Toner sheet using my Fuse Machine.  This was then die cut using Master Layouts 1 (along with the black mat).  These were added to the card base. The image and sentiment were stamped on white paper and then manually cut to size and added to a black mat.  These were added to the card.  Wink of Stella was added to the wings of the dragonfly to add a bit of shimmer.

Friday, July 12, 2024

Another Foiled Birthday Card!

Here is another card made with a Stencil and associated Stencil-Mate

I used the following for the card:

  • Gina K Designs - Lush Leaves Stencil and matching Stencil-Mate
  • Gina K Designs - Tranquil Teal, Lucky Clover, Wild Wisteria Ink
  • Gina K Designs - Master Layouts 1
  • Gina K Designs - Birthday Cheer Poly-glaze
  • Therm-o-web - Emerald Watercolor and Champagne Deco Foil

To make the card, I foiled the Stencil-Mate with the Emerald Watercolor foil.  Then using the stencil, the various inks were added.  The image was then cut using the Master Layouts 1, along with the associated mat (in this case I used blue foil paper).  The sentiment was cut using the oval from Master Layouts 1 (along with the blue foil mat).  The sentiment was foiled using Champagne Foil.  The pieces were assembled and added to the card base to complete the card. 

Sunday, July 7, 2024

Foiled Happy Birthday (Gina K)

A while back I got some of the Stencil-Mates from Gina K.  I picked the ones that matched stencils I already had.  I liked that the Stencil-Mate would allow you to add foil around the edges of the stenciled image.  Here is a card I mage with the Thick Brush Stencil and Stencil-Mate:


I used the following for the card:
  • Gina K Designs - Thick Brush Stencil and matching Stencil-Mate
  • Gina K Designs - Tranquil Teal, Lucky Clover, Wild Wisteria Ink
  • Gina K Designs - Master Layouts 1
  • Gina K Designs - Birthday Cheer Poly-glaze
  • Therm-o-web - Gold and Champagne Deco Foil

To make the card, I foiled the Stencil-Mate with gold foil.  Then using the stencil, the various inks were added.  The image was then cut using the Master Layouts 1, along with the associated mat (in this case I used blue foil paper).  The sentiment was cut using the oval from Master Layouts 1 (along with the blue foil mat).  The sentiment was foiled using Champagne Foil.  The pieces were assembled and added to the card base to complete the card. 


Friday, June 7, 2024

Kendra's Card Challenge #14

I finally got all of the cards for Kendra's Card Challenge #14 complete.  For this set of cards, I channeled my inner Gina K!  I added black borders to almost everything and used only supplies from Gina K Designs (except one sentiment).   All of the cards used the Watercolor Floral patterned paper, and when ephemera was used it the Watercolor Floral ephemera.  These were a fun set of cards to make.


Here is a detailed look of each of the cards:

Card 1:

  • Gina K Designs - Large and Small Oval dies, Black Onyx Ink, Birthday Blessings Stamp Set

Card 2:

  • Gina K Designs - Black Onyx Ink, Birthday Blessings Stamp Set

Card 3:

  • Gina K Designs - Master Layouts 3, Birthday Babble Sentiment Sheets

Card 4:

  • Gina K Designs - Black Onyx Ink, Natural Silhouettes Stamp Set

Card 5:

  • Gina K Designs - Large and Small Rectangle dies, Foil Mates Birthday Essentials, Grass Green Foil

Card 6:

  • Gina K Designs - Black Onyx Ink, Birthday Blessings Stamp Set, 
  • Hero Arts - Circle Infinity Dies

Card 7:

  • Gina K Designs - Foil Mates Birthday Essentials, Grass Green Foil

Card 8:

  • Gina K Designs - Black Onyx Ink, Love is All You Need Stamp Set

Card 9:

  • Gina K Designs - Black Onyx Ink, Peach Bellini Ink, Grass Green Ink, Dusty Rose Ink,  Wreath Builder Template, Wreath Builder Stamp Set, Autumn Wreath Builder Stamp Set

Card 10:

  • Gina K Designs - Master Layouts 3, Birthday Babble Sentiment Sheets

Card 11:

  • Gina K Designs - Black Onyx Ink, Birthday Cheer Mini Stamp Set
  • Hero Arts - Circle Infinity Dies

Card 12:

  • Gina K Designs - Black Onyx Ink, 
  • Clearly Besotted - Tiny Type Stamp Set, 
  • Hero Arts - Circle Infinity Dies

Card 13:

  • Gina K Designs - Black Onyx Ink, Simple Sentiments Stamp Set, Scripty Quartet Dies

Card 14:

  • Gina K Designs - Black Onyx Ink, Simple Sentiments Stamp Set, 
  • Hero Arts - Circle Infinity Dies, 
  • Versamark, 
  • Stampendous - Detail Gold Embossing Powder

Card 15:

  • Gina K Designs - Black Onyx Ink, The Wetlands 2 Stamp Set


Friday, May 31, 2024

My first layered vinyl project

A while back I purchased several baseball cap blanks from Cricut.  There was a great sale, and since I wear these when travelling, it was a great purchase.  I then needed to add something, and while searching through Cricut Design Space, I found the perfect image to add to the cap.  It was an opportunity to try my hand at layering vinyl since there where two colors.  I think it came out pretty good for a first try!


Friday, May 24, 2024

Happy Anniversary

I realized at the last moment that I had no Anniversary cards!  I made this one, and it was quick and easy!

I used the following for the card:

  • Gina K Designs - Tranquil Lotus Stencil
  • Gina K Designs - Summer Silhouettes stamp set
  • Gina K Designs - Light and Medium Lilac, Medium Spruce and Black Onyx Ink
To make the card, I stenciled the flower images directly on the card base.  The Sentiment was then stamped to complete the card!  Quick and easy!

Monday, May 13, 2024

Postage Stamp Mothers Day card

I used lots of stamps for this card!  Each postage stamp used a different silhouette stamp from a variety of sets!


I used the following for this card:

  • Gina K Designs - Master Layouts 14
  • Gina K Designs - Black Onyx, Ocean Mist, Lovely Lavender, Applemint Inks
  • Gina K Designs - Masking Magic Strips
  • Gina K Designs - Wild Blossoms, Friendly Silhouettes, Natural Silhouettes Stamp sets
  • Close to My Heart - Framed Stamp of the Month
  • Waffle Flower - Postage Collage, Fall Postage Collage Stamp sets

To make the card, I cut the postage stamps from Master Layouts 14.  I also cut the matching mat piece from a piece of black card stock.  On the postage stamps, I used masking magic strips to mask out the areas between the stamps and the very edges.  The inks were then added to each stamp using blending brushes.  The images were stamped in black for each stamp, and postage amounts were added to all but the sentiment postage stamp.  The postage stamps were added to the mat, and then the entire piece added to the card base to complete the card.