Pages

Monday, December 25, 2017

Merry Christmas with SImon Says Stamp Christmas Token Die

Merry Christmas!  Here is the a simple Christmas Card made with the Simon Says Stamp Christmas Token Die:


To make this card, I used the following:

  • Simon Says Stamp Christmas Token Die
  • Distress Oxide Ink - Broken China, Faded Jeans, Salty Ocean
  • Perfect Pearls - Perfect Pearl 
To make the blue background, I used the Distress Oxide Inks lightest to darkest, for a bit of an ombre look.  This was then spritzed with water mixed with the Perfect Pearls.  I then cut our the Christmas Token, (saving it for another card).  The Christmas Token was then cut from white card stock.  The blue background was then added to a dark blue card base.  The white Christmas token was added to complete the card.

And here is the card I made with the left over Christmas token:

The background for this card was made using the  Close to My Heart Snowflakes Seasons and Nature stamp set.  The snowflakes from that set were stamped with  Memento Summer Sky ink and Brilliance Platinum Plant ink.  The Token was then added on top of the card base.

Monday, December 18, 2017

Watercolored Ornament Card

Here is an Art Impressions watercolor image turned into an ornament for a Christmas Card:


To make this card, I used the following:

  • Art Impressions - Wooden Door
  • Marvy LePlume II -African Violet, Sepia, Pine Green, Persimmon, Brilliant Yellow
  • Hero Arts - Infinity Circle Dies
  • Versamark
  • Stampendous Detailed Silver Embossing Powder
  • Gina K - Complements of the Season Stamp set
  • Elizabeth Craft Designs - Ornament Set 1 dies
  • Quicky Glue Pen
  • Elizabeth Craft Designs Cool Diamond Glitter
  • Sizzix Ornament Embossing Folder
  • Glossy Accents
To make the card, I used the stamps from the Wooden Door Stamp set.  Each of the stamps were colored with the LePlume markers and stamped.  Water was added, using a watercolor brush to soften the lines and make the image look like a water colored image.  Once dry, glitter was added to the snowy areas of the image (you can't see it in the picture). The entire image was then cut using one of the circle dies.  The ornament top and string were cut in sliver using the Elizabeth Craft Designs Ornament dies.  The background was embossed using the Sizzix embossing folder, leaving about 1/2 and inch at the bottom.  The sentiment was added using Versamark and Silver Embossing Powder.  The water color image, with the ornament top and string were added to the embossed background.  This was then added to the card base.  Glossy Accents was then added to the entire ornament to complete the card.

Monday, December 11, 2017

Foiling with Stencils

I like the look of foil on cards, and using a stencil is a great way to add foil.  Here are some Christmas cards made with a stencil:


A close-up look at each card:


To make these cards, I used the following:
  • Heidi Swapp Minc Foil Red and Green
  • Gina K - Let it Snow Stamp Set
  • Memento Brilliance - Platinum Planet Ink
  • Deco Foil Transfer Gel
  • Tim Holtz - Holiday Script Stencil

To make the card, I first stamped snowflakes (from the Gina K Let it Snow Stamp Set) with Platinum Planet ink, all over the card stock.  I then placed the stencil over the stamped snowflakes, and added the Transfer Gel.  The stencil was removed, and once the gel was dry, the image foiled with either the Red or Green foil.  The entire image was cut down and added to the card base to complete the card.

Monday, December 4, 2017

Peace and Joy Christmas Card

I love the simplicity of this card


I used the following to make this card:

  • Penny Black - Winter Joy
  • Just for Fun - 3 Wise Men on Camels
  • Distress Oxide Ink - Salty Ocean, Faded Jeans, Black Soot
  • Versafine Black Onyx Ink
To make the card, I masked out an area near the bottom of the card.  In this area I blended Salty Ocean and Faded Jeans Distress Oxide Ink.  Black Soot was added around the edges.  The 3 Wise Men on Camels was then stamped in the Distress Oxide Ink area with Versafine Black Onyx Ink.  The sentiment from Winter Joy was then added.  The entire panel was then matted and added to a card base to complete the card.

Monday, November 27, 2017

Deco Foil and Tim Holtz Christmas Card

I love the look of foil on cards.  I saw a similar card on a Gina K Youtube video (see it here), and decided to try it myself.  I have two different pictures of the same card, with different lighting in an attempt to show the foil (which does not photograph well!):


I used the following to make the card:

  • Deco Foil Transfer Gel
  • XpressIt Foil Deco Tape
  • Tim Holtz Festive Stencil
  • Deco Foil Emerald Watercolor
  • Neenah Smooth Desert Storm card stock
To make the card, I placed the stencil over the card stock and covered the area with a thin layer of the Deco Foil Transfer Gel.  The stencil was removed and the gel allowed to set until clear.  The foil was added using a laminator.  The panel was then trimmed to size and added to the card base.  The Deco tape was added to the edge of the panel to complete the card.


Monday, November 20, 2017

Styled Woodland Christmas Cards

I took a class a few years ago, where we made a card similar to this one, since I had the stamps and stencil, I decided to make a few of these for Christmas this year.


I used the following to make the card:

  • Tim Holtz Holiday Knit Stencil
  • Tim Holtz Styled Woodlands Stamp set
  • Various Distress Markers
  • Distress Ink - Tea Dye
  • Ribbon
To make the card, I colored one of the wreath stamps with the Distress Markers.  The stamp was then spritzed with water, and stamped on a piece of watercolor paper.  The stencil was then placed over the image and distress ink added.  The sentiment was added to the middle of the wreath. The panel was then cut to size, ribbon added and added to the card base to complete the card.

Monday, November 13, 2017

Stampendous Train Post Card

A while back, I got the Stampendous Train Post Card stamp, and finally had a chance to use it!  Here is the card I made with it.  While its a Christmas themed card, I didn't color it that way - looks more like summer!


I used the following to make the card:


  • Stampendous - Train Post Card stamp
  • Various Copic Markers
  • Distress Ink - Tea Dye


This was a simple card to make.  The image was stamped with Memento Tuxedo Black ink, then colored with Copic markers.  I used the Distress Ink on the edges to give the image a bit of an aged look.  The image was then trimmed and added to a card base to complete the card.

Monday, November 6, 2017

Art Impressions Foiled Christmas Card

I thought these Art Impressions snowmen were so cute! I thought that they looked great on a panel that was foiled.


To make the card, I used the following:

Art Impressions Holly Jolly Set

  • Zig Clean Color Brushes
  • Versafine Black Onyx Ink
  • Deco Foil - Lime
  • Hero Arts - Infinity Nested Frame Cuts - Oval
  • Gina K - Foil-Mates Holly Jolly 
  • Gina K - Foil-Mates Large Snowflakes
  • Gina K - Fancy Foils Silver Sequins
To make the card, I used a 4 x 5.25 piece of the Large Snowflakes Foil-Mates.  I then added the Silver Sequins foil to the panel.  I cut the sentiment from the Holly Jolly Foil-mates with a Hero Arts oval die, and then added the Lime Green foil.  This was added to the snowflake panel.  The snowmen were stamped with Versafine Black Onyx Ink and then colored with various Zig Clean Color brushes. They were then fussy cut and added to the snowflake panel.  The panel was added to a green card base to complete the card.

Monday, October 30, 2017

Poinsettia and Candy Cane Basket Christmas Card

Another Christmas Card.  I am really trying to get all of my cards done before Thanksgiving this year!


To make this card, I used the following:

  • Northwoods Rubber Stamps - Poinsettia and Candy Cane Basket 
  • Prisma Color Pencils
  • Gamsol
  • Wink of Stella - clear
  • Enamel Accents Classic Cherry
  • Nuvo Crystal Drops Brilliant Gold
  • Versafine Black Onyx Ink
To make the card, I stamped the image with Versafine.  The image was then colored with Prisma Color Pencils.  I used a bit of gamsol to blend the color in the poinsettia and basket.  Wink of Stella was added to the ribbon to add a bit of shimmer to the card.  I added the Enamel Accents to the berries, and Nuvo Crystal Drops to the centers of the poinsettia.  Once the drops were dry, the image was cut to 4 x 5.25 and added to the card base to complete the card.


Monday, October 23, 2017

Happy Birthday with Altenew Pattern Play - Hexagons

The Altenew Pattern Play Hexagons was one of the stamps I knew I had to have when I first saw it.  Here is a card I made with it:


I used the following to make the card:
  • Altenew Pattern Play - Hexagons Stamp Set
  • MFT Black Hybrid Ink
  • Lawn Fawndamentals Deep Sea and Mermaid Ink
  • Ranger Dye Ink - Caribbean Coast
  • Memento - Teal Zeal
  • Tim Holtz - Celebrate Dies
  • Pssst Shimmer Spray - Sparkle
To make the card, I stamped the outline Hexagon image with the Black Hybrid Ink.  I then used the various blue inks and stamped the individual hexagons.  The entire image was then spritzed with the Pssst Shimmer Spray to add a bit of shimmer.  Happy Birthday was then cut out from the main image with the TIm Holtz Celebrate dies.  The image was then added to a card base to complete the card.

Monday, October 16, 2017

Technique Junkies - Rose Anniversary Card

Here is an Anniversary card made with a Technique Junkies stamp.


I used the following to make the card:

  • Technique Junkies - Rose Stamp
  • Versamark
  • Perfect Pearls
  • Gina K Scripty Sayings 2
  • Stampendous Rose Gold Embossing Powder
To make this card, I stamped the Roses with Versamark on black card stock.  Different colors Perfect Pearls were then carefully added to different areas of the stamped image. The sentiment was stamped with Versamark on vellum.  Rose gold embossing powder was added and heat set.  This was added to the panel, and then the panel added to the card base to complete the card.

Monday, October 9, 2017

Technique Junkies - Tropics

This stamp from Technique Junkies reminded me of our many cruises to the Caribbean, so I had to get it!  Here is the card I made with it:


I used the following to make the card:
  • Technique Junkies - The Tropics (S150)
  • Versafine Black Onyx Ink
  • Zing Clear Embossing Powder
  • Various Distress Inks
This was a very easy card to make!  The images was stamped with Versafine Black Onyx ink, and then covered with clear embossing powder and heat set.  I then used various colors of Distress Inks to color the sky, water and beach.  The image was then matted, and added to a card base to complete the card.  

Monday, October 2, 2017

Quilts in an old Trunk

I really like quilts, and quilting isn't my thing.  The next best are stamps with a quilting theme.  Here is a card I made with a new (to me) stamp from Rubber Cottage.


I used the following to make the card:

  • Memento - London Fog Ink
  • Various Copic Markers
  • CTMH Joyful Birthday Occasions Stamp set
  • Lawn Fawndamentals - Mermaid ink
  • Prisma Color Pencils
  • Rubber Cottage - Trunk (771FB) Stamp
To make the card, I stamped the Trunk image with the Memento ink.  This was then colored with Copic Markers and detail added with Prisma Color Pencils.  The sentiment was added, and then the entire panel was matted.  This was then added to the card base to complete the card.

Monday, September 25, 2017

Mama Elephant Halloween Card and a Galaxy Background

Here is the last Halloween card I made with the Mama Elephant Bootastic Stamp Set:


I used a lot of different items to make this card!

  • Martha Stewart Happy Halloween Stamp Set
  • Mama Elephant Bootastic Stamp Set and Matching Dies
  • MFT Small Brick Backgroup Stamp
  • Various Distress Oxide Ink
  • Versamark
  • Stampendous Detailed Black Embossing Powder
  • Various Copic Markers
  • Lawn Fawn Hippo Ink
To make the card, I first created the Galaxy background for the card.  I made this using a technique shown by Jennifer McQuire (click here to see the details).  While that was drying, I then stamped the small brick background, using the Hippo Lawn Fawn ink.  This was then colored with Fired Brick Distress Oxide Ink.  I then stamped the images from Bootastic, colored them with various Copic Markers, and cut them out with the matching dies.  To the front of an A2 sized card, I added a strip of dark green card stock.  A small portion of the Brick wall was then added.  The Galaxy background was added to the top of the card.  The images from Bootastic were added.  To complete the card, I stamped the bats from the Happy Halloween stamp set, along with the sentiment in Versamark.  Embossing Powder was added and heat set to complete the card.

Monday, September 18, 2017

Another Mama Elephant Halloween Card

Her is another card made with the Mama Elephant Bootastic stamp set and Distress Oxide Inks:


To make this card, I used:

  • Distress Oxide Ink
  • Mama Elephant Bootastic Stamps and Dies
  • SSS Stitched Circle Dies
  • Lawn Fawn Spooktacular Stamp set (sentiment)
  • Various Copic Markers
  • MFT Diagonal Stripes Stencil
To make the card, I stamped and colored the images from Bootastic.  These were then colored with Copic Markers, and then cut with the matching dies.  The card base was made using the MFT stencil and Distress Oxide Ink.  I then changed the direction of the stencil and repeated the process.  The white of the base was a bit to bright, so I added additional Distress Oxide ink over the stenciled areas. A circle was cut using the Simon Says Stamp Stitched Circle Dies, and the sentiment was added. The circle was added to the card base and then the images added to complete the card.

Monday, September 11, 2017

Halloween Card with Mama Elephant

I've used the Mama Elephant Bootastic Halloween stamps several years now. They are perfect for the cards I make for the grandkids.  I also just got the Distress Oxide inks and had to play with them. Here is another card made with these stamps:


I used the following to make the card:

  • Mama Elephant Bootastic Stamps and Dies
  • Various Copic Markers
  • Martha Stewart Happy Halloween Stamps
  • Distress Oxide Ink
  • Versafine Black Onyx Ink
  • Memento Tuxedo Black Ink
To make the card, I stamped the images from the Bootastic stamp set, colored them with various Copic Markers, and then cut the images with the matching dies.  Distress Oxide Inks were used for the background. The fence, bats and bird from the Happy Halloween stamp set were then added with Verafine Black Onyx ink.  The sentiment was added, and the Bootastic images were added to complete the card.


Monday, September 4, 2017

MFT Thankful Friend

Fall is coming soon, and this card is perfect fall card.


I used the following to make the card:

  • Various Copic Markers
  • Various colors of Memento Ink
  • MFT Thankful Friend Stamps and Matching Dies
  • Hero Arts Color Layering Fall Trees
  • Art Impressions Fence
To make the card, I stamped the girl with Tuxedo Black Memento Ink, I then colored the image with Copic Markers.  The image was then cut out with the matching die.  I then prepared the card front. The fence was stamped with Memento Rich Cocoa ink, and then colored with Copic Markers.  The leaves (from MFT Thankful Friend) were stamped below the fence, and colored with Copic markers. The grass was then colored with Copic Markers.  The trees were stamped with a  variety of Memento Inks.  The girl was then added with pop dots to add a bit of dimension to complete the card.

Challenges Entered:

Simon Says Stamp Monday Challenge - Stamp It

Monday, August 28, 2017

Tim Holtz Mini Doodle Greetings and Northwood Rubber Stamps Christmas Card

Here is my first Christmas Card I've made for this year.  I used two of my favorite stamps for this card - one by Tim Holtz, the other by Northwoods Rubber Stamps.


I used the following to make the card:
  • Northwoods Rubber Stamps - Snowman and Bird
  • Tim Holtz - Mini Doodle Greetings
  • Versamark
  • Stampendous - Detailed White Embossing Powder
  • Copic Markers
  • Wink of Stella - Clear
  • Memento Tuxedo Black Ink
To make this card, I stamped the Snowman with the Memento Ink.  This was then colored with various Copic Markers.  I used Wink of Stella for the snowman to give it a bit of shimmer.  The image was trimmed down and added a dark blue panel.  The sentiment is from the Tim Holtz Mini Doodle Greetings stamp set.  I stamped this with Versamark, and then added the embossing powder and heat set.  The panel was then added to the card base to complete the card.

Monday, August 21, 2017

Gina K Sending Love Birthday Card

When I first saw the Gina K Sending Love stamp set - I had to have it!.  Here is a card that I made with one of the images.

I used the following to make the card:

  • Versafine Black Onyx Ink
  • Zing Clear Embossing Powder
  • Copic Markers - Y13, Y15, Y17, YG61, YG63
  • Gina K - Sending Love Stamp Set
  • Gina K - Vertical Greetings & Things

To make the card, I stamped the image with Versafine Black Onyx ink, and then added the Zing Clear Embossing Powder and heat set.  The images were then colored with the Copic Makers.  I then trimmed the image down, and matted it with Black paper.  This was added to the card base.  I then added the Birthday sentiment from the Vertical Greetings & Things stamp set to complete the card.

Monday, August 14, 2017

Anniversary Card with Penny Black Poppy Gems

Here is an Anniversary Card I made using Penny Black Poppy Gems.


I used the following to make the card:

  • Penny Black - Poppy Gems
  • Versafine Black Onyx Ink
  • Zing Clear Embossing Powder
  • My Favorite Things - Together Forever Stamp set
  • Zig Clean Color Brushes
  • Pssst Sheer Shimmer - Gold
To make this card, I stamped the image with Versafine Black Onyx ink, then added the embossing powder and heat set.  I then water colored the images with Zig Clean Color Brushes.  Instead of leaving the background plain, I decided to add color with the Zig Clean Color Brushes.  I then spritzed the image with Pssst Sheer Shimmer.  The sentiment was added and the panel added to a card base to complete the image.


Monday, August 7, 2017

Art Impressions Watercolor Anniversary Card

Another Anniversary card made with Art Impressions Watercolor stamps.


To make this card, I used:

  • Distress Markers
  • Art Impressions Water Color Stamps from the following sets:
    • Spring Basket 4605
    • WC Birds Set 4872
    • EZ Project A UM4271
    • Foliage Set 4051
    • WC Containers
    • Flower Set 4052
  • Simon Says Stamp Stitched Squares
  • My Favorite Things - Together Forever Stamp Set
  • Versamark
  • Stampendous Detailed White Embossing Powder
To make the card, I colored the stamps with the Distress Markers, and after stamping the image, added water to create the watercolor look to the images.  The completed image was then cut out with the Simon Says Stamp Stitched Square die.  This was then added to the card base, and the sentiment
was added with Versamark, and embossing powder added and heat set to complete the card.

Monday, July 31, 2017

Birthday Card with Perfect Pearls

I recently saw this card made by Justine Hovey, and once again, I had all of the supplies so I made my own version of the card.  You can't see the shine of the Perfect Pearls in the picture, but its very visible in person!


I used the following to make the card:

  • Versafine Black Onyx Ink
  • Zig Clear Embossing Powder
  • Perfect Pearls - Forever Red, Forever Blue, Forever Green, Forever Violet
  • Pretty Pink Posh Sequins - Lime Sorbet and Aquamarine
  • Greenhouse Society - Stems stamp set (for the greeting)
  • Versafine
  • Simon Says Stamp Floral Sparkle Die
To make the card, using white card stock, cut slightly smaller than the card base, I cut the flowers using the Floral Sparkle die.  The sentiment was stamped using Versafine Black Onyx ink, clear embossing powder added and heat set.  On the card base, I masked the edges, and then added Versafine to the left side.  Perfect Pearls were then added to the area.  The top piece was then added to the card base.  Sequins were added to complete the card.

Thursday, July 27, 2017

Card with Northwoods Rubber Stamps

Here is a card that  I made with a Northwoods Rubber Stamp, called Three Adirondack Chairs and Lake.


I used the following to make the card:

  • Northwoods Rubber Stamps - Three Adirondack Chairs and Lake
  • Prisma Color Pencils
  • Versafine Black Onyx Ink
TO make the card, I stamped the image with the Black Onyx ink.  The image was then colored with various Prisma Color Pencils.  The image was then trimmed, matted and added to the card base.  For this card, I didn't add a sentiment to the front of the card, since I didn't want to take away from the image.

Monday, July 24, 2017

BIrthday card with MFT Diagonal Quit Square Coverup

This card is similar to one I made a few years ago (check it out here).


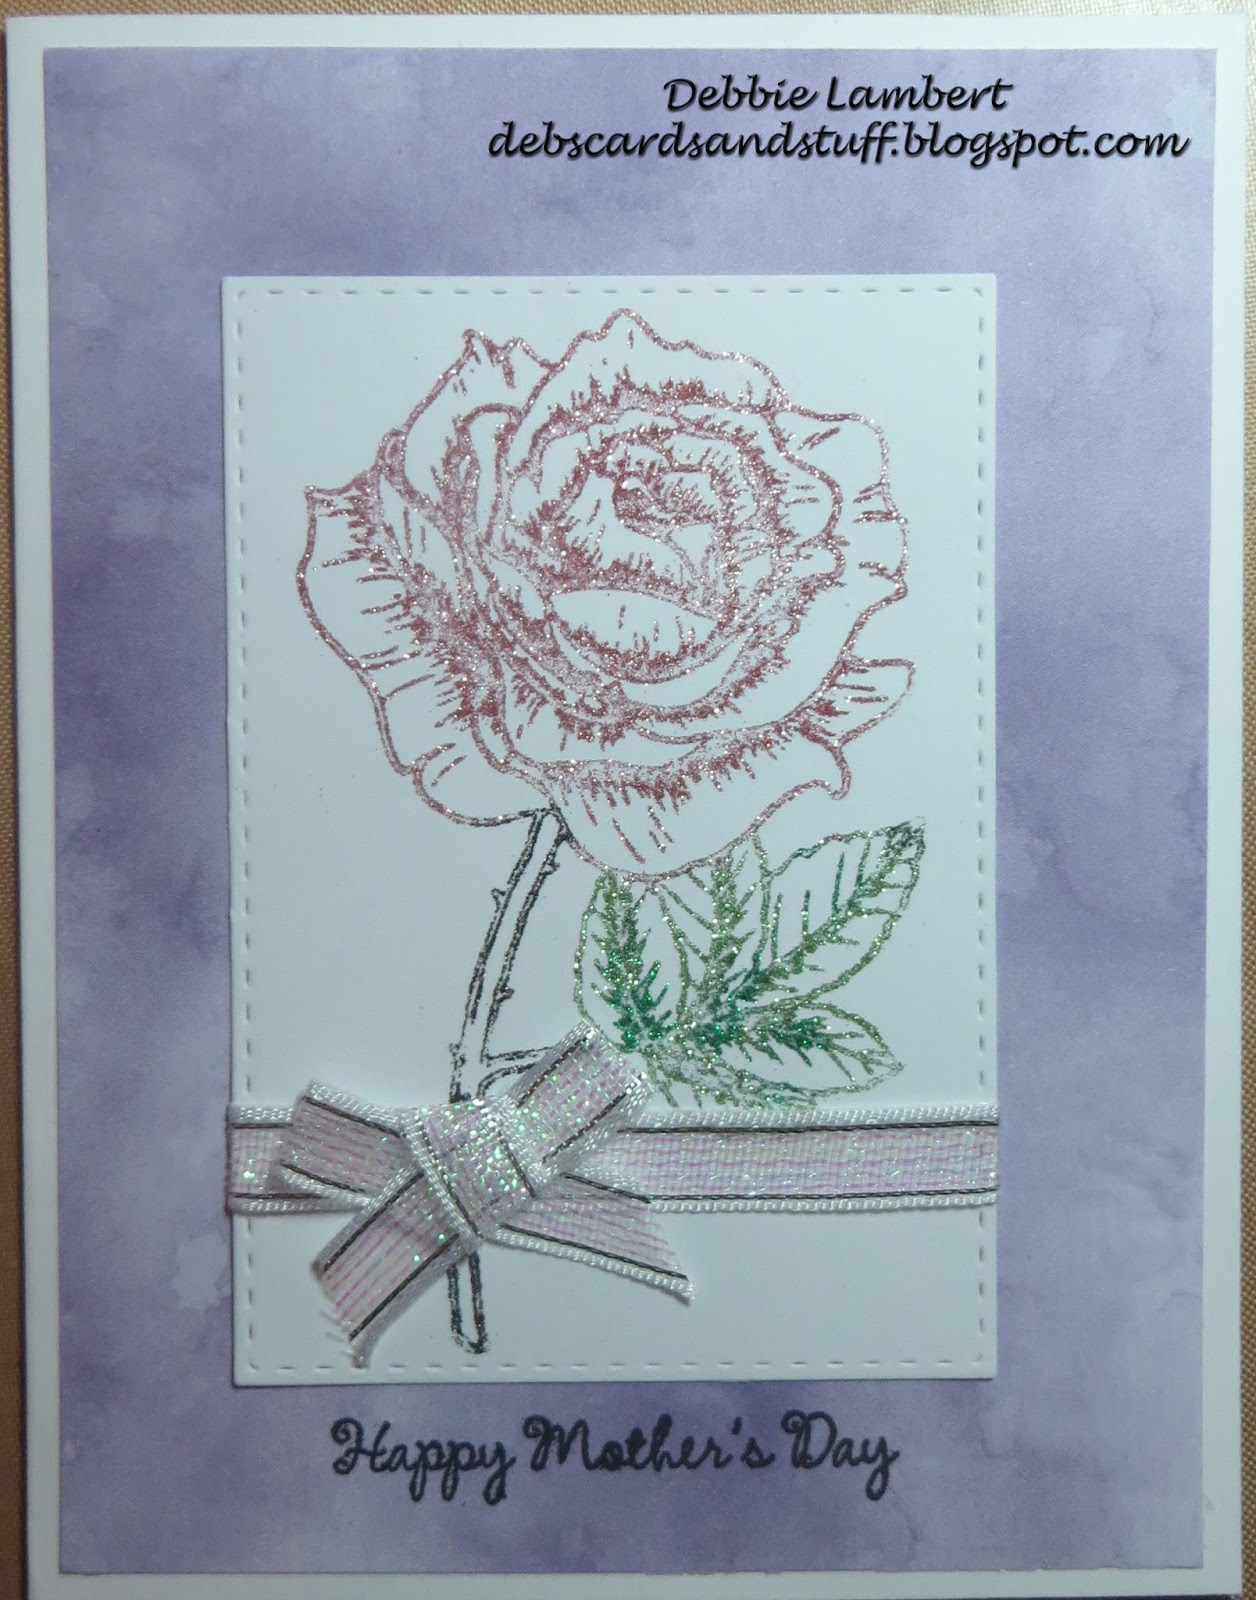
For this card, I used:
Soookwang Double Sided tape
MFT Diagonal Quilt Square Coverup
Glitter Ritz Royal Blue, Silver, Sea Green
Elizabeth Craft Designs White Micro Fine Glitter
CTMH Joyful Birthday Occasions
Lawn Fawndamentals - Freshly Cut Grass

TO make the card, I added the Sookwang tape to a piece of white card stock.  Using the die, I then ran the die and the tape covered paper through my Cuttlebug.  In my case, I know that this will cut through the tape, but not through the paper completely, which is what I wanted.  I then carefully removed sections of the tape to expose the sticky and add the glitter.  After each color, I made sure I burnished the glitter in before exposing the next sections and adding the glitter.  The completed image was added to the card base.  I carefully scored two lines below the image and at the bottom of the card.  Between these lines, I stamped the sentiment to complete the card.

Thursday, July 20, 2017

Autumn Card using Gilding Flakes

I recently saw this post from Jennifer McGuire and realized it was something that I could do, and even had gilding flakes!  In my case, the gilding flakes were more of an Autumn color, so I knew I had to do a card for the fall.

Here is my card:

I used the following to make the card:

  • Sookwang 1/4" double sided tape
  • La D'ore Scarlet Ice Flakes FSC 1 127
  • Versamark
  • Stampendous Rose Gold Embossing Powder
  • Autumn Stamp set (Its been in my stash a while, and I don't know the manufacturer) 
To make the card, I laid the tape on a diagonal, evenly across a piece of black card stock.  I then exposed the sticky part of the tape and added the gilding flakes.  This was then cut at an angle, and I figured out where I wanted the greeting.  Once I had that, I stamped the greeting in Versamark, and added the embossing powder and heat set.  The gilded portion was then added to the card front, using craft foam behind the pieces.  The leaves were stamped with  Versamark, embossing powder added and heat set.  They were then fussy cut and added to the front of the card to complete the card.

Monday, July 17, 2017

Birthday Card with Deco Foil "Leftovers"

Ever since I started foiling, I have these left over pieces of foil.  I've been trying to use these leftovers in making cards.  Here is a card that I made with some of the leftovers.  Of course, I ended up with more leftovers - which I will use on another card in the future!

I used the following:
  • Toner Sheets
  • Heidi Swapp Minc Holographic Foil, Blue Foil
  • CTMH Celebration Stamp Set
  • Versamark
  • Stampendous Detailed White Embossing Powder
To make the card, I used a left over piece of blue foil, which was the "leftover" piece for this card.  It was leftover from a previous card I made using Simon Says Stamp Circular Rose stencil.  This leftover was added to a toner sheet.  Since there was still a large area of toner sheet, I then added the Holographic foil.   Since this is very shiny - I needed to tone it down a bit, by embossing a sentiment to vellum.  This was then added to the foiled piece, and added to the card base to complete the card.


Thursday, July 13, 2017

Deco Foil Transfer Gel Foiled card

Here is another Foiled card I made:


For this card, I used the following:

  • Simon Says Stamp Circular Rose Stencil
  • Deco Foil Transfer Gel
  • Heidi Swapp Blue Foil
  • Memento Danube Blue Ink
  • CTMH Joyful Birthday Occasions
To make the card, I secured the stencil to a piece of paper, and then added a thin layer of Deco Foil transfer gel.  Once it was dry, I added the blue foil.  This was then cut down to 4x4 and added to the card base.  I carefully added two score lines below the image and to the bottom of the card.  The sentiment was then added to complete the card.

Monday, July 10, 2017

Foil left overs made into cards

After having created some great foiled cards, I had left over pieces.  What do do?  Make some cards. Here are the cards:

Card #1:


Card #2:

For the first card, I had some left over Sweet Mango Foil, from foiling a piece of Gina K Elegant Damask paper.  I added the foil to a piece of toner paper.  Once I looked at it I realized it looked very "Halloweeny", so a Halloween card was made.  I used Lawn Fawn Spooktacular stamps and stamped the pumpkin using Sweet Mango ink, and the hat with Memento Black Ink.  Both were colored with Copic markers.  I then cut the image with a Spellbinders Classic Oval die and sponged over it with more Sweet Mango ink.  This was then matted with black.  I colored a bit of ribbon with the ink as well.  The ribbon was added to the foiled piece, then the pumpkin image added to complete the card.

For the second card, I again used toner paper, and foiled with a left over piece of Wild Lilac foil.  With this card, it needed a lighter background, so I then added Heidi Swapp silver foil.  I used one of the Happy Birthday Gina K Foil Mates sentiments.  This was cut using a Simon Says Stamp Square Stitched dies, and foiled with Wild Lilac foil.  It was matted with black paper.  Ribbon and a bow were added to the main foiled piece, and the sentiment added to complete the card.

Monday, July 3, 2017

Birthday Cards with Gina K. Foil-mates

I love the look of foil!  The foil-mates designs from Gina K. are beautiful.  I decided to get coordinating foil, paper and ink, along with some foil-mates, and just play.  The paper is wonderful and I will be definitely be ordering more!  I made 2 cards, and several backgrounds, which I will use on future cards.  The only problem with foil, is that its just so difficult to photograph!

Here are the cards I made:


To make the cards, I used the following:

  • Gina K - Wild Lilac Paper, Foil
  • Gina K - Sweet Mango Paper Foil and Ink
  • Gina K - Foil-mates Elegant Damask, Birthday Essentials
  • Simon Says Stamp - Stitched Rectangles and Stitched Squares
Making the cards was very easy!  I cut the Elegant Damask paper in half,  Each side was foiled.  I cut the sentiments with the Simon Says Stamp Stitctched dies.  These were then foiled.  The background and the sentiment were then matted with black paper.  For the Sweet Mango card, I used the matching ink and colored a white ribbon.  The ribbon was added to the background and then added to the card base.  For the Wild Lilac card, I just used white ribbon, which was added to the background and then added to the card base.  For both cards the sentiments were added with pop dots to provide a bit of dimension to the card.

Monday, June 26, 2017

Art Impressions Lazy Boy

Here is a card I made for my dad's birthday.


My dad take naps in his Lazy Boy chair, and loves potato chips!  As soon as I saw this stamp set, I knew I had to get it and use it for my dad's birthday card.  In my parents house, there is a large quilt hanging on the wall.  I used a quilt stamp to mimic that for this card.

To make the card, I used:

  • Art Impressions Lazy Boy Set 4159
  • Copic Markers
  • Prismacolor Pencils
  • Purple Daisy Designs - Tulip Bouquet Quilt Q 2262
  • Impression Obsession - Wooden Plank CC172
  • Memento Ink - Tuxedo Black, Rich Cocoa, Desert Sand
  • Lawn Fawndementals Ink - Hippo

I first stamped the Art Impressions stamp with Memento Tuxedo Black ink.  The image was colored with various colored Copic Markers.  The image was then fussy cut.  For the background, I stamped the Wooden Plank on the bottom portion of the card with Rich Cocoa.  I then sponged the same ink over the stamped area.  The quilt was then stamped using the Lawn Fawndementals Ink on the top left of the card, and colored with Prismacolor pencils.  The "wall" was also colored with Prismacolor Pencils.  I then lightly sponged Desert Sand Ink on a strip of paper, and added the sentiment. The sentiment was then added to the bottom of the card.  The main image added next.  The entire piece was matted with black paper and added to the card base.

Challenges entered: Art Impressions Create A Background

Monday, June 19, 2017

A quick Fathers Day card with the Cricut

I don't use my Cricut much for making card (although I use it a lot for scrapbooking!).  I found this card on the Artfully Sent cartridge.  The card has an interesting fold ....


To make the card, I used:

  • Cricut Artfully Sent cartridge 
  • Graphic 45 "Time to Flourish" paper pad
This was an easy card to make.  I first cut the card base out, in teal on the Cricut, using the suggested size.  I then added the rectangles to the card to complete it.  A sentiment is stamped on the inside of the card.

Monday, June 12, 2017

FIrst Try with GLitter Foil

A while back, I got some foil and glitter foil from HSN to use with my Minc machine.  I finally had a chance to use the Glitter foil, and I was not impressed.  I was expecting complete coverage, but it ended up having a more distressed look.  (I did run this through the Minc, at setting 5, twice!). I'm not sure if I will be using the Glitter foil again.

I did make a card with it, and used matching foil for the sentiment.

To make the card, I used:

  • Heidi Swapp Minc Paper Packet
  • Glitter Foil and Foil from HSN
  • Gina K Foilmates for the sentiment
  • Spellbinders Classic Squares Dies
To make the card, I used the Glitter foil on the stripe paper included in the packet.  I ran this through the Minc twice, with a heat setting of 5.  This was then trimmed to size and matted on black card stock and added to the from of the card.  For the sentiment, I used a Gina K Foilmate sentiment.  This was cut with one of the square dies, and then foiled.  It was also matted in black, and added to the from of the card using pop dots, to add a bit of dimension.

Monday, June 5, 2017

Crazy Dogs Birthday Card.

A Birthday card for a dog loving friend.  The sentiment doesn't show well in the picture.

To make this card, I used the following:
Xpress It Foil Deco Tape
Copic Markers
Versamark
Wow Metallic Platinum Embossing Powder
Wink of Stella - Clear
Glossy Accents
Memento Tuxedo Black
Tim Holtz - Crazy Dogs Stamps and Dies, Crazy Things Stamps and Dies and Crazy Talk Stamps
Pssst Sheer Shimmer Spritz - Silver

To make the card, the images were stamped, with Memento Tuxedo Black Ink, then cut with the matching dies.  The images were then colored with a variety of Copic Markers.  The card base was then prepared, using a strip of Deco foil tape along the edge.  The background was then sprayed with the Pssst Sheer Shimmer Spritz.  The images were then added to the card.  The sentiment was stamped with Versamark, and the embossing powder added and heat set.  The balloons and ribbons on the presents were colored with Wink of Stella to add a bit of glitter.  Glossy Accents was then added to the balloons to complete the card.

Monday, May 29, 2017

Fathers Day with Art Impression Stamps

Here is a stamp I made with Art Impressions Water Color Stamps.


To make this card, I used the following:

  • Marvy LePlume II markers
  • Art Impressions Foliage Set 4051, WC Tree Set 4269, WC Series 2 Set 4053, Flower Set 4052, EZ Project B
  • Close to My Heart Framed Stamp of the Month

To make the card, I colored the stamps with the markers, and stamped them.  Water was then added, pulling the color out of the lines of the images.  Additional color was added as needed.  The image was trimmed down, and added to the card base.   The sentiment was added to complete the card.

Monday, May 22, 2017

Penny Black Any Occasion Card

Here is a card I made using a Penny Black Stamp and Zig Clean Color Real Brush pens.  I haven't decided the occasion for the card yet, so the final sentiment hasn't been added.


To make the card, I used the following:
Versafine Black Onyx Ink
Zing Clear Embossing Powder
Penny Black - Gentle Day Stamp
Zig Clean Color Real Brush Pens
Simon Says Stamp Stitched Rectangles

To make the card, I stamped the image with Versafine Black Onyx Ink, then added the clear embossing powder and heat set.  The image was then colored with the Zig Clean Color pens.  In this case, I just used the pens and blended the colors directly - no water was added.  The image was cut with the Stitched Rectangle die, and added to the blue background (also cut with a larger Stitched Rectangle die).  This was then added to the card base to complete the card.

Monday, May 15, 2017

Glittery Mothers Day Card

The picture doesn't show how glittery this card actually is!  This card uses an image stamped using the essential glue pad, and glitter.  Its a technique I've tried before, but this is the first time I got it to work.  I think in the past I wasn't patient enough, and didn't let the glue get to the tacky point.


For this card I used the following:

  • Greenhouse Society Rose Stamp
  • Glitter Ritz - Java Bean, Sea Green, Pink
  • Essential Glue Pad
  • Close To My Heart - Just to Say Stamp Set
  • Simon Says Stamp Stitched Rectangles

To make the card, I stamped the image using the Essential Glue Pad.  I waited until the glue was tacky, and then added the glitter to the image, using Java Bean for the stem, Sea Green on the leaves and Pink for the rose.  The image was cut with the Stitched Rectangle die, and ribbon was added.  This was then added to the card base and the sentiment added to complete the card.

Monday, May 8, 2017

Northwoods Rubber Stamps - Anniversary Card

I used one of the Northwoods Rubber Stamps to create an Anniversary Card for my husband.  We visited this lighthouse last year.  Here is the card:


I used the following to make the card:
  • Northwoods Rubber Stamps - Portland Head Light House in Square Frame - PP10038
  • Versamark Black Onyx Ink
  • Prismacolor Pencils 
  • Gamsol
  • Gina K - Scripty Sayings 2 stamp set
  • Stampendous Detailed White Embossing Powder
  • Versamark
To make the card, I stamped the image with Black Onyx Ink.  The image was then colored with various Prismacolor pencils, using gamsol to blend the colors.  The image was then added to a mat, and the card base.  The sentiment was stamped with Versamark, detailed white embossing powder was added and then heat set to complete the card.

Challenges entered:

Simon Says Stamp Monday Challenge: It's a Frame Up

Monday, May 1, 2017

Another Easter Card with Elizabeth Craft Designs

Here is another late Easter Card.

I used the following to make the card:

  • Elizabeth Craft Designs - Shimmer Sheets
  • Elizabeth Craft Designs - Outdoor Edges die #914
  • Elizabeth Craft Designs - Easter Eggs die #1148
  • Elizabeth Craft Designs - Glitter Dots
  • Zig Clean Color - #20, #202, #80, #81, #51
  • Simon Says Stamp Stitched Rectangles
  • Lawn Fawn - Eggstra Special Easter stamp set
To make the card, I randomly colored the Zig Clean Color markers on a piece of Bristol paper.  I used a bit of water to blend the colors together.  From this I cut the detailed portions of the eggs.  I then cut the solid portions for the eggs using Shimmer Sheets.  The details portions of the eggs were added to the shimmer sheet eggs.  Glitter dots were added to the eggs.  The grass was cut from a sheet of Green Shimmer Sheets, using the Outdoor Edges die.  The eggs and grass were added to background piece of My Favorite Things Water color wash paper.  The entire piece was then cut using the stitched Rectangle die and added to the card base.  The sentiment was added to complete the card.


Monday, April 24, 2017

Easter card with Elizabeth Craft Designs Peel-off stickers and glitter

So, my Easter cards did not get finished until AFTER Easter.  At least I can save them until next year.
Here is a card that I made with Elizabeth Craft Designs Peel-off Stickers and Glitter:


I used the following to make the card:

  • Copic Markers - YG63, B00, V04, V06, E13, E23
  • Elizabeth Craft Designs - Silk Microfine Glitter - Cool Diamond 
  • Sookwang Tape
  • Spellbinders Classic Scalloped Ovals
  • Pretty Posh Pink - Sugar Plum Mix Sequins
  • Elizabeth Craft Designs - Peel-off Stickers Eggs - #899, Happy Easter - #380
To make the card, I covered a piece of white card stock with the Sookwang tape, removed the release sheet and added the Egg and Stand Peel-off sticker.  Cool diamond glitter was then added to the piece.  Copic Markers were used to color the egg and stand.  These were then fussy cut out and added to the Scalloped Oval.  The entire piece was added to the card base.  The sentiment and sequins added to complete the card.


Monday, March 6, 2017

Art Impressions Watercolor Mothers Day Card.

Here is a card I made with Art Impressions Watercolor Stamps.  I plan on using this one for a Mothers Day card.


I used the following to make the card:

  • Art Impressions Watercolor stamps: WC Containers, Flower Set #4052, Foliage Set #051
  • Distress Markers Picked Raspberry, Pine Needles, Ripe Persimmon, Gathered Twigs, Wilted Violet, Hickory Smoke
  • My Favorite Things Watercolor wash paper
  • Spellbinders Classic Ovals
  • Lawn Fawndementals Fake Tan
  • Close To My Heart Just to Say

To make the cards, I colored the stamps with the Distress Markers, then stamped the images. Water was then added to give a water colored image.  The image was then cut with an oval die.  A piece of the Watercolor Wash paper was cut to slightly smalled than the card base.  The sentiment was then added, using one of the stamps form the Just to Say stamped set, using the Lawn Fawndementals Ink. Ribbon was added.  This was then added to the card base.  The image was then added, using pop dots.  A bow was added to complete the card.

This card was entered in the Art Impressions "Let's Watercolor" Challenge

Monday, February 27, 2017

Art Impressions Watercolor Birdhouses

Here is a card I made with Art Impressions Watercolor stamps.  I love these stamps, and the process to make watercolor images!

I used the following to make the card:

  • Art Impressions Flower Set #4052, Foliage Set #4051, WC Series Set 2 #3545
  • Distress Markers Abandoned Coral, Wilted Violet, Pine Needles, Picked Raspberry, Mowed Lawn
  • Molotow Masking Fluid
  • Close to my Heart Just to say Stamp Set
  • Versamark 
  • Stampendous Detailed White Embossing Powder
  • Simon Says Stamp Stitched Rectangles
  • My Favorite Things Watercolor Wash Paper
To make the card, I first created the fence using the Molotow Masking Fluid pen.  Once it was dry, I stamped the images by coloring the stamps with the distress pens, and adding water to the images to give a water colored image.  The masking fluid was then removed, and detail was added.  The image was then cut with one of the stitched rectangle dies.  This was then added to a piece of Watercolor wash paper.  I made the card base by cutting out a larger rectangle with a stitched rectangle from the center of the card front.  The sentiment was stamped with Versamark, detailed white embossing powder added and heat set.  The image was then added to complete the card.


Monday, February 20, 2017

Stampin' Up Wetlands Birthday Card.

This stamp set is great for masculine cards!  Here is a card that I recently made:


I used the following to make the card:


  • Kuretake Gansai Tambi Watercolors #44 Light Brown, #47 Dark Brown #62 Cobalt Blue
  • Stampin' Up Wetlands Stamp Set
  • Memento Rich Cocoa, Cottage Ivy
  • Stampendous Detailed White Embossing Power
  • Versamark
Using the watercolors, I created the background.  The birds were then stamped using the Rich Cocoa Ink.  The reeds were stamped with Cottage Ivy.  The entire piece was then cut down, matted and added to the card base.  The sentiment was stamped with Versamark, the embossing powder was added and heat set to complete the card.

Monday, February 13, 2017

Valentines Day Love Card

Its been a while since I made a card!  Here is a card I made for my husband for Valentines Day.  I couldn't resist using foil and glitter on one card.


Here is the inside of the card:


I used the following to make the card:
  • Glitter Ritz - Cool Highlight
  • Sookwang Tape
  • Simon Says Stamp Stitched Square Die
  • Cuttlebug Embossing Folder - Hearts
  • Die-namites Heart Love Die
  • Core'dinations Black Magic Card stock
  • Heidi Swapp Minc Red Foil
To make the card, I embossed a piece of Black Magic Card stock with the Hearts embossing folder.  I then lightly sanded it, to show the red of the embossed image.  The heart was cut with the Die-namites Heart Love die.  Sookwang tape was added to a piece of white card stock and cut with a Stitched Square die.  The tape was then removed, and the glitter added and burnished in.  The heart was added to the glittered piece of card stock, and the entire piece was added to the embossed hearts. This was then added to the card base.

For the inside of the card, I printed a simple heart with text on a laser printer.  I then ran this through my Minc machine with red foil.  I then added it to the inside of the card.