Pages

Monday, December 28, 2015

WPlus9 Flora and Fauna 2

I wanted to try a no-line water coloring technique, and this stamp set seemed to be perfect for it.  Since I don't have watercolors, I used Distress Markers.   Here is a card that I made with WPlus9 Flora and Fauna 2.


I used the following to make the card:

  • WPlus9 Flora and Fauna  2
  • Distress Markers - Wild Honey, Forest Moss, Peacock Feathers, Mowed Lawn, Seedless Preserves, Worn Lipstick, Black Soot
  • Distress Ink - Antique Linen
  • Memento Lulu Lavender
  • CTMH Joyful Birthday Occasions
  • Watercolor Paper
  • Wink of Stella clear

To make the card, I first stamped the images with Antique Linen.  I then added the Distress Markers, and with a water brush lightly blended the color out. Around the flowers and birds I added a very light wash of color.  Once the image was dry, I stamped the sentiment from Joyful Birthday Occasions in Lulu Lavender.   Wink of Stella was added to the Birds to give them a bit of simmer.  The entire piece was trimmed down and mounted on the card base to complete the card.

Monday, December 21, 2015

Northwoods Rubber Stamps - Man FIshing In Canoe with Dock

I love the names that Northwoods Rubber Stamps gives to their stamps!  They are very descriptive.  I love the stamps.  I've used this stamp before and colored them with Copic Markers.  I was new to Copics, and didn't have many colors.  Since the stamp is detailed, and at the time my Copic skills were novice, it didn't come out as good as it could have.  Recently I got a full set of Prismacolor Pencils, and thought I would use this stamp again.  Here is the result:


I really liked the result.  It seemed as if I could get the details much better with the Pencils.  Now I need to try it again with Copics!

This card is 4.25 x 5.5, and was made with the following:
  • Northwoods Rubber Stamps P9104 - Man Fishing in Canoe with Dock
  • Prismacolor Pencils
  • Versafine Black Onyx Ink
  • Gamsol
The card was easy to make - I stamped the image with Versafine Black Onyx Ink, and colored it with the Prismacolor Pencils.  I used a bit of Gamsol to blend the color in the water and the dock.  Once completed, I trimmed the image, matted it and added it to the card base to complete the card.

Monday, December 14, 2015

Need Last Minute Christmas Cards? (Stampendous Delicate Snowflake)

Well, this year I needed a few more Christmas Cards.  I didn't have enough time to make any detailed cards, but then I remembered I had the Delicate Snowflake stamps from Stampendous.  The largest stamp fits perfect on a 4 x 5.5 card.  I was able to make several of these cards in about an hour.  Here is the card:


To make this card I used:

  • Versamark
  • Stampendous Detailed While Embossing Powder
  • Stampendous Delicate Snowflakes
  • Lawn Fawn Winter Scripty Sayings
This was one of the easiest cards to make! I trimmed a piece of dark blue card stock slightly smaller than the card base.  I then stamped the largest of the Delicate Snowflake stamps with Versamark.  The embossing powder was added and heat set.  I then stamped the sentiment with Versamark, added the embossing powder and heat set.  The image was then added to the white card base.

Monday, December 7, 2015

Thank You Card with Inkadinkado Hummingbird with Flower Stamp

I recently reorganized my stamp storage.  I also un-mounted all of my wood mounted stamps.  I found this stamp during my reorganization.  I thought that this stamp would work great with Distress Markers.  The card is 4.25 x 4.25 and here is the card I made with the Inkadinkado Hummingbird with Flower Stamp:


To make the card, I used the following:
  • Inkadinkado Hummingbird and Flower Stamp
  • Distress Markers - Picked Raspberry, Worn Lipstick, Salty Ocean, Black Soot, Peeled Pain, Chipped Sapphire, Forest Moss
  • WPlus9 Hand Lettered Thanks Stamp set
  • Versafine Black Onyx Ink
  • Watercolor Paper
To make the card, I colored the stamp with the Distress Markers, and then lightly sprayed the colored stamp with water.  I then stamped the image onto Watercolor paper.  Using a water brush, I lightly pulled the color into the different areas, while still maintaining the outline.   Once the image was dry, I stamped the sentiment, and then mounted the image to the card base.

Monday, November 30, 2015

Northwoods Rubber Stamps - Three Birdhouses with Morning Glories and Birds

I made this card for my Mom for her Birthday.  The card is 4.25 x 5.5.


To make this card, I used:
  • Northwoods Rubber Stamp - Three Birdhouses with Morning Glories and Birds (P9080)
  • Prismacolor Pencils
  • Versafine Black Onyx
  • Gamsol

To make the card, I stamped the image with Versafine, and colored it with my Prismacolor Pencils.  I used Gamsol to blend the color in the Bird Houses.  The image was trimmed and matted, and then added to the card base to complete the card. 

Monday, November 23, 2015

Bird Crazy Christmas

I just can't seem to get enough of the Bird Crazy Stamps!  With the Crazy Things accessories, these birds can be used for any occasion!  Here are the cards, each is 4.25 x 5.5:


I kept a lot of the elements the same between the cards.  Here are some close-ups:


For these cards I used the following:
 
  • Bird Crazy Stamps and Dies
  • Crazy Things Stamps and Dies
  • Memento Cottage Ivy, Tuxedo Black
  • Copic R20, R21, R24, R27, R29, E04, E93, N0, N2, B21, B24, B29, BG000, BG02, YR12, YR14, G20, G21, G24, YG63, YG67
  • Stampin' Up Lovely As A Tree
  • Ranger Texture Paste
  • Memory Box Winter Tiny Snowflakes
  • Wink of Stella Clear
To make the cards, I stamped the birds, the Santa hats, and packages with Memento Tuxedo Black ink.  These were then colored with the Copic Markers. Wink of Stella was used on the packages and the trim on the hats. I then used the associated dies and die cut the birds, hats and packages.
 
For the background, I stamped the trees with Memento Cottage Ivy, using first and second generation stamping.  I then added the snowflakes using the Winter Tiny Snowflakes stencil and Ranger Texture Paste.  Once dry, I added the birds.  The entire piece was then added to the card base to complete the card.


Monday, November 16, 2015

Monster Truck Birthday Card

Here is a card I made for one of the grandkids, who loves Monster Trucks.  The card is 4.25 x 5.5.


It took a while to find a Monster Truck Stamp that would be appropriate for a teen (it could not be too "cutesy").  I found an on-line store Local King Rubber Stamp, which has some wonderful stamps including the one I used for the card. 

I used the following to make the card:
  • Local King Rubber Stamp - Rough Riders Stamp set
  • Memento Tuxedo Black Ink
  • Wink of Stella Clear
  • Copic Markers B00, C5, C3, C1, C00, R27, B0000
  • Versmark
  • Stampendous Detail Black Embossing Powder
  • Close to My Heart Joyful Birthday
  • Black Brads
  • Glossy Accents
To make the card I stamped the image with Memento Tuxedo Black, and then colored it with the Copic Markers.  I added Wink of Stella to the Truck body.  I then fussy cut the image, which was then added to silver card stock.  The sentiment, from Joyful Birthday was stamped with Versmark, Detail Black embossing powder as added and heat set.  This was then matted with red card stock.  Brads were added at the corners, and then the entire piece was added to a black card base.  Glossy Accents was then added to the windows to finish the card. 

Monday, November 9, 2015

Christmas Tag Card with WPlus9 Quilt Prints

A while ago, I got the WPlus9 Quilt Prints Stamp set, and finally had a chance to use it this year.  Here is the card I made using the stamp to create the background.  The card is 4.25 x 5.5


I used:
  • Memento Tuxedo Black and Desert Sand Inks
  • Ranger Dye Ink Classic Cherry and Lily Pad
  • WPlus9 Quilt Prints Stamp set
  • Phrases Cricut Cartridge
  • Close to My Heart Ornamental Cheer
  • Stampendous Detail Gold Embossing Powder
  • Versmark
  • Ribbon
To make the card, I stamped the outline shape from the Quilt Prints.  I then filled in the blank areas with a variety of the stamps from the set using Desert Sand, Classic Cherry and Lily Pad inks.  I trimmed the image to 4.25 x 5.  The tag on the card was cut from the Phrases Cricut Cartridge.  The tag was then stamped with Versmark with one of the stamps from Ornamental Cheer.  Gold embossing powder was added and heat embossed.  Ribbon was added to the tag, and the tag was added to the Quilt image and then added to the card base.

Monday, November 2, 2015

Playing with Pan Pastels

So, the other day, I decided to play a bit with my Pan Pastels. This is the card I ended up making, which was not at all what I had originally had in mind! 


I was thinking of making a Christmas card, with a gold Pan Pastel background. I wanted a solid gold, but instead ended up with a shimmery gold.  So then I decided to cover it with green.  But I still wanted a gold element, so I tried stenciling some stars with gold Pan Pastels.  That didn't work either.  I ended up just blending the gold into the green.  Finally, I tried stamping with Versmark, and then lightly adding a brown (actually Orange Extra Dark) to the stamped image, and lightly blending it into the green,  Although it doesn't show in the photograph, I was able to add a gold shimmer, by adding some Gold Pssst Sheer Shimmer.  The image was then trimmed and matted.  Ribbon was added before adding it to the card base.

Supplies used:
  • Stampin' Up Lovely as a Tree stamp set
  • Versmark
  • Pssst Sheer Shimmer Gold
  • Pan Pastels 280.1 Orange Extra Dark, 640.3 Permanent Green Shade, 911.5 Rich Gold

Monday, October 26, 2015

Last Halloween Card for 2015

For this card, I used a variety things, CTMH Artbooking Cricut Cartridge, Mama Elephant and Lawn Fawn stamps, and Distress Ink.


For this card, I used the following:
  • Close to My Heart Aek & Shriek Stamp Set
  • Close to My Heart Artbooking Cricut Cartridge
  • Mama Elephant Bootastic Stamp Set
  • Lawn Fawn Spooktacular Stamp Set
  • Versmark
  • Stampendous Detailed Black Embossing Powder
  • Ranger Liquid Platinum Embossing Powder
  • Distress Inks Forest Moss, Stormy Sky, Chipped Sapphire, Block Soot
  • Glossy Accents
To make the card, I sponged the Distress Inks on watercolor paper.  I then spritzed it with water.  I cut the spider web from the Artbooking cartridge and attached it to the card.  I tamped the cat (from Aek and Shriek) and spider (from Bootastic) in Versamark and added Detailed Black Embossing powder and heat set.  I then stamped the tombstones and sentiment (from Spooktacular) in Versmark and added Liquid Platinum Embossing Powder and heat set.  The entire image was added to the card base.  Glossy Accents was added to the spider web to complete the card.

Monday, October 19, 2015

Mama Elephant Bootastic and Lawn Fawn Spooktacular Halloween Card

Here is another Halloween Card I made with the Mama Elephant Bootastic and Lawn Fawn Spooktacular stamp sets.   I found several layouts similar to what I used on Pinterest.  I found that both of these stamp sets work well together.


For this card, I used:
  • Mama Elephant Bootastic Stamp Set and Matching Dies
  • Lawn Fawn Spooktacular Stamp Set
  • Copic Markers C1, C3, C5, R29, R59, E50, E53, Y06, YR14, E35, Y31
  • Versamark
  • Memento Tuxedo Black Ink
  • Stampendous Detailed White Embossing Powder
  • Spellbinders Square Dies
  • Signo White Pen
To make the card, I stamped the images from Bootastic with Memento Tuxedo Black Ink.  These were then colored with Copic Markers and cut with the matching dies.  I then cut 3 squares from a strip of black paper.  and backed the strip with white card stock.  The Halloween boys and girls were then added to the strip.  I stamped the sentiment (from Lawn Fawn Spooktacular) with Versmark Ink on orange card stock.  Detailed White embossing powder was added and heat set. 
 
The black strip, sentiment and spiders were then added to the card base.  I used the White Signo pen for the spider's web.


Monday, October 12, 2015

Halloween Card 2015

Here is yet another Halloween Card I made this year. 


For this card, I used:
Tim Holtz Shattered Stencil
Distress Ink Forest Moss, Stormy Sky, Chipped Sapphire, Dusty Concord, Black Soot
Ranger Vintage Photo Embossing Powder
Memento Rich Cocoa Ink
Lawn Fawn Spooktacular Stamp Set
?? Tree Stamp

To make the card, I placed the stencil on a piece of watercolor paper.  I then sponged the various Distress Inks over the stencil.  I then removed the stencil, and stamped the tree with Versmark and then added the Vintage Photo Embossing Powder and heat set.  The sentiment stamp is from Lawn Fawn Spooktacular and was stamped with Rich Cocoa Ink

Monday, October 5, 2015

Lawn Fawn Spooktacular Halloween Card

Here is a Halloween Card made from Lawn Fawn Spooktacular Stamps and matching dies.


For this card, I used:
  • Simon Says Stamp - Stitched Rectangles
  • Lawn Fawn Stitched Hillside Borders
  • Copic Marker C3
  • Memento London Fog Ink
  • Distress Ink Stormy Sky, Chipped Sapphire, Dusty Concord, Black Soot
  • Zing Clear Embossing Powder
  • Stampendous Detailed White Embossing Powder
  • Lawn Fawn Spooktacular Stamps and matching dies
To make the card, I first cut watercolor paper with the large rectangle from the Simon Says Stamp dies.  I sponged the various Distress inks on watercolor paper, only going about halfway down.  I then cut three different colors green card stock with the Stitched Hillside borders,  These were then added to the watercolor paper.  The tombstones were stamped on white card stock with London Fog Ink, colored with Copic C3, and then cut with the matching die.  The ghosts were stamped on vellum with Versamark, the Detailed White embossing powder was added and heat set.  These were then cut out with the matching die.  The ghosts and tombstones were then added to the card.  The sentiment was stamped with Black Memento Ink.

Monday, September 28, 2015

Mama Elephant Bootastic Halloween Card

Here is another Halloween Card I made.  This one using Bootastic from Mama Elephant.

For this card I used:
  • Mama Elephant Bootastic Stamps and Dies
  • Copic Markers C1, C3, C5, R29, R59, E50, E53, Y06, YR14, E35, YR 31
  • Stampendous Detailed Black and Enchanted Aubergine Embossing Powders
  • Ranger Liquid Platinum Embossing Powder
  • Martha Stewart Halloween Stamps
  • Distress Inks Forest Moss, Stormy Sky, Chipped Sapphire, Dusty Concord, Black Soot.
To make the card, I first crated the background.  I used watercolor paper and the distress inks like watercolors.  I then stamped the images from Bootastic on white card stock with Memento Black ink.  These were then colored with the Copic markers, and cut using the matching dies.  I added the images to the background I had created.  The fence, bats and sentiment were stamped with Versmark,  Enchanted Aubergine embossing powder was added to the fence, Detailed Black Embossing Powder used for the bats and Liquid Platinum added to the sentiment and heat set.  The entire image was added to the card base.

Monday, September 21, 2015

Bird Crazy Halloween Cards

Love these Crazy Birds!  They are quick and easy to color, and the matching dies are wonderful.

Here are two Halloween Cards I made with the Bird Crazy stamps and dies.  I also used Crazy Things and Crazy Talk.


For these cards I used:
  • Bird Crazy, stamps and dies
  • Crazy Things
  • Crazy Talk
  • Distress Ink (a variety of colors)
  • Staz-on Black
To make the cards, I stamped the birds twice with the Staz-on ink, then colored them with the Distress Inks.  Then using the matching dies, I cut the birds, eyes and wings.  I then stamped and colored the broom, hat and pumpkin.  For these, I needed to fussy cut them, since I don't have the matching dies. I stamped the sentiment on a piece of scrap paper.

I assembled the cards, using pop-dots for the eyes and layering all of the other images.  The moon was cut from a piece of patterned paper.  There was a blank area on the card, so  I stamped a few bats (from an old Martha Stewart set) in black.

Challenges Entered:
Simon Says Stamp Stamptember use a Stamp Challenge and Blog Hop

Monday, August 31, 2015

Scrapbook Page with Lea France Celtic Knot Template

So, I've been working on my scrapbooks instead of card making.  I really like using the Lea France templates for my scrapbook pages, since I can get lots of pictures on one page, and end up with a great layout.  There are several templates available from Lea France.  For these pages I used Celtic Knot.


Yes, even this page used the Celtic Knot template.  I wanted to use the patterned paper, and only used a portion of the template.  Without the use of the templates it would have been much harder to align the pictures and keep everything even and aligned.


Monday, August 3, 2015

Weekend Warrior by Art Impressions

Here is a card that I made for my husband.  While he is no longer a "weekend warrior", I knew he would still enjoy it.

I used the following to make the card:

  • Copic Markers - B14, B12, C3, C5, C7, YR07, YR18, B95, B97, B99, E31, E33, E11, E13, E15, E35, E37, E42, E44
  • Art Impressions - Weekend Warrior 4378
  • Lawn Fawndementals - Walnut
  • Distress Ink - Gathered Twigs
  • Wink of Stella - Clear
  • Memento Tuxedo Black
  • Versamark
  • Stampendous Detailed Silver Embossing Powder
  • Grumbacher Miskit Frisket
  • Spellbinders large circle die
  • Cricut Artiste Cartridge
  • Embossing Folder

To make the card, I stamped the image with Versamark, and then colored it with the Copic Markers.  I added the floor using grays.  I then covered the entire colored image with Miskt Frisket masking liquid.  Once dry, I stamped the background using a wood grain background stamp, stamped with Walnut ink.  This was then sponged over with Gathered Twigs Distress Ink.  The Frisket was then removed.  The image was cut with the Spellbinders die.  A slightly lager circle was cut from my Cricut.  The image was then mounted to the larger circle.  Wink of Stella was added to the tools, for a slightly metallic look. 

The cad base is silver and was embossed with an embossing folder.  The image was then added to the card.  A one inch strip of dark blue card stock was added to the bottom of the card. The sentiment was stamped with Versamark, the embossing powder added, and heat set to finish the card.

Monday, July 27, 2015

Vintage Roses by Altenew took over my craft desk!

I really like the Vintage Roses stamps from Altenew.  The biggest problem I had with them was that I didn't have enough different colors o inks - at first.  To stamp these you need 3-4 different shades of similar colors.  It was a good reason to get some inks. 


Then the problem I had was that I stamped and cut so many of them, in a variety of colors.  They took over my craft desk.  So I needed to find a way of incorporating them into some cards.  I found a wonderful layout at:  http://heartshugsandflowers.blogspot.com/2015/07/marika-blue.html. So I used that as a basis for the cards that I made.


To make the cards I used:

  • Vintage Roses - Altenew - Stamps and Dies
  • Yellow Roses - Altenew Ink - Warm Sunshine, Butter Cream, Caramel Toffee, Paper Bag
  • Green Leaves - Altenew Ink - Evergreen, Forest Glade, Frayed Leaf
  • Pink Roses - Altenew Ink - Grape Vine, Ruby Red, Coral Berry, Frosty Pink
  • Purple Roses - Memento Ink - Lulu Lavender, Sweet Plum, Grape Jelly
  • Red Roses - Memento Ink - Rhubarb Stalk, Lady Bug.  Hero Arts Shadow Ink - Raspberry Jam 
  • Blue Roses - Memento Ink - Summer Sky Danube Blue (second generation stamping).  Ranger Dye Ink - Blue Ribbon
  • Stampendous Detailed White Embossing Powder
  • Versamark
  • CTMH - Happy Birthday Stamp
  • Unknown - Happy Anniversary
To make the cards, I added a 2" strip of either green or purple card stock to the bottom of a white card.  I then cut a 1" strip of black paper, and stamped the sentiment with Versamark to the right of the strip.  Detailed White embossing powder was added and heat set.  This strip was added to the card.  The flowers were then added to the card.

Here are some close up pictures of the cards:


Monday, July 20, 2015

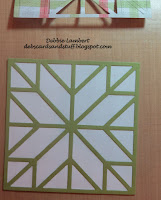
MFT Quilt Square Cover-up with Glitter

I really like the MFT Quilt Square Cover-up die, and I really like glitter.  So I had to use both for this card.


I used the following to make the card:
  • MFT Quilt Square Cover-up die
  • Glitter Ritz Micro-fine Glitter in Pink, Lilac, Silver, Merlot
  • Sookwang Tape
  • Versamark
  • Stampendous Detailed Silver Embossing Powder
  • CTMH Joyful Birthday Occasions

To make the card, I added the Sookwang tape to white card card stock.  I wanted to cut the Quilt Square just so the tape cut, but not all the way through the card stock.  It took a few trials with my Cuttlebug to get the layers right for this, but for me it was the A plate, C Plate, card stock with the Sookwang tape (Tape side up), B plate.  What worked out great, for me, was that the edges cut all the way through, so there was no trimming.  

I then carefully pulled off the section where I wanted to add the first color of glitter.  


Glitter was added, the excess brushed off, and then burnished into the tape.


 I repeated the process for the remaining colors.


And here is the completed Quilt Square:


I then mounted the Quilt Square to the front of the card base.  The sentiment is from CTMH Joyful Birthday Occasions.  This was stamped with Versmark, the embossing powder added and heat set to complete the card.

Monday, July 13, 2015

More cards with MFT Quilt Square Cover Up

For this card I used some of the left overs from the previous cards I made. 


I used the following to make the cards:
  • My Favorite Things - Quilt Square Cover-up - left over cuts
  • Gina K Simply Snowflakes Stamp Set
  • Versamark
  • Stampendous Detailed Gold Embossing Powder
  • Various Buttons from RosiesButtons
  • Kreinik #16 Braid 002HL
To make the card, I used the left over cuts from previous cards made with the Quilt Square Cover-Up.  For this card, I used the larger pieces, and carefully aligned them near the top of the card base. A strip of matching paper was added to the bottom of the card.  The sentiment from the Simply Snowflakes stamp set was stamped in Versamark.  Detailed Gold Embossing Power was added and heat set.  Kreinik braid, was tied through the button.and added to the front of the card to finish the card.

Monday, July 6, 2015

Christmas in July with MFT Quilt Square Cover Up

Last Christmas I got the die-namics quilt square cover up as a Christmas gift.  I finally was able to have the time to use it, and figured Christmas Cards would be a good use!  I was also able to use some vintage buttons from RosiesButtons.

Here are the cards I made using the die:

And some closeups:


I used the following to make the cards:

  • My Favorite Things - Quilt Square Cover-up
  • Gina K Simply Snowflakes Stamp Set
  • Versamark
  • Stampendous Detailed Gold Embossing Powder
  • Various Buttons from RosiesButtons
  • Kreinik #16 Braid 002HL
To make the card, I first cut several different patterned papers and solids using the Quilt Square Cover-up.  I then cut a square out of white card stock slightly smaller than the outline of the Quilt Square.  Double sided tape was added all over the white base,


The outline for the quilt was added to the base.


I then started adding the patterned papers.  I did this for all the different variations.  


To finish the card, I added the quilt square to the card base, near the top of the card.  The sentiment is from the Gina K. Simple Snowflakes stamp set.  This was stamped in Versamark, the Gold embossing powder was added, and heat set.  I then raided my needlepoint stash for some Kreinik braid, which was tied through the button.  The buttons were then added to the front of the card to finish the card.


Monday, June 22, 2015

Narwhals for Fathers Day?

Yes, if you have a husband that will sing or hum the Narwhal song!  (You can the Narwhal Song on YouTube).  The Lawn Fawn 'Critters in the Arctic' has the cutest Narwhal, which is what I used.


I used the following to make this card:

  • Distress Ink - Tumbled Glass, Broken China, Salty Ocean, Chipped Sapphire
  • Simon Says Stamp - Wave Stencil, Stitched Rectangles Die
  • Lawn Fawn - Critters in  the Arctic, Stitched Hillside Borders
  • Copic - C1, C3, C5, C6, YR14
  • Memento - Tuxedo Black Ink
  • Versamark
  • Ranger - Blue Ribbon Dye Ink
  • Stampendous - Detailed White Embossing Powder


To make the card, I first used the Wave Stencil and Distress Ink, on white card stock.  I started with the darkest color and slowly moved to the lighter colors.  I would occasionally move the stencil around, to get a more realistic looking waves.  I then added the lightest color to the remaining white areas.  I then used one of the Stitched Rectangles dies to cut the 'waves' into a rectangle.  The rectangles was then cut using the Stitched Hillside Borders dies, to get an even more wavy looking background.

The Narwhals were stamped using Memento Tuxedo Black, and then colored with the Copic Markers.  These were then cut by hand.  I then placed them between and over the "Waves".  I used the water droplet stamp that is part of the set to add the water splashes.  The entire image was added to the card base.

The sentiment was stamped with Versamark.  The Detailed White Embossing powder was added and then heat set.

Monday, June 15, 2015

A Bicycle Father Day Card

Here is a simple card I made for Fathers Day.  This card is 4.25 x 5.5.


I used the following to make the card:

  • Versamark Ink
  • Memento Tuxedo Black Ink
  • Spellbinders Oval Dies
  • Zing Clear Embossing Powder
  • Bicycle Stamp


To make this card, I stamped the Bicycle using Memento Tuxedo Black.  I then cut the image out using a Spellbinders oval die.  Using the next size up of the oval dies, I cut another oval in a coordinating patterned paper. For the card base, I stamped the Bicycle several times in Versamark, added the clear embossing powder and heat set.  The patterned paper oval was added to the card base, and then the Bicycle Oval was added.

Monday, June 8, 2015

Art Impressions Fathers Day Card - Golfer

Here is another Fathers Day card.  This card in 4 x 5.25.


I used the following to make this card:

  • Copic Markers T0, T2, E31, E44, B12, B14, B16, C1, C3, E50, E53, RV00, E33, E35, B60, B63, B66, B000, B00, YG61, YG63, YG67
  • Wink of Stella - Clear
  • Art Impressions - Gordon the Golfer
  • Signo White Pen
  • Memento Tuxedo Black
  • Simon Says Stamp Stitched Rectangles

To make the card, I first cut a stitched rectangle.  I then stamped the golfer with Memento Tuxedo Black.  The image was colored with a variety of Copic Makers.  Wink of Stella was added to the golf club. The grass and sky were added using Copic Markers.  The golf tee was added with the Signo White pen.  The sentiment was added.  The entire image was then added to the card base.

Monday, June 1, 2015

Wetlands Fathers Day Card

Here is the next Fathers Day card.  This card is also 4.25 x 5.5


I used the following to make this card:
  • Stampin' Up - Wetlands
  • Seaside Stampin' Ink - Beach Stories
  • Memento Cottage Ivy, Desert Sand, Summer Sky
To make the card, I stamped the goose from Wetlands with Cottage Green ink.  I then sponged Desert Sand and Summer Sky around the image.  The Sea Grass, from Beach Stories was stamped twice in Cottage Green ink.  Using a 1" square punch, I punched to top part of the image out.  These two pieces were then sponged with Desert Sand and Summer Sky inks.  All three images were then mounted on dark green card stock and added to the card base.

Monday, May 25, 2015

By the Tide Fathers Day Card

Here is the first of the Fathers Day cards I made this year.  This card is 4.25 x 5.5.


I used the following to make this card:

  • Stampin' Up By the Tide Stamp Set
  • Close to my Heart Just to Say Stamp Set
  • Memento Desert Sand and Potters Clay inks
  • Ranger Classic Cherry Dye Ink


To make the card, I first stamped the images from By the Tide. Then, to soften the edges, I lightly sponged with Desert Sand.  The main image was then mounted to red card stock, and added to the card base.  The sentiment, from Just to Say, was stamped on a thin strip of white card stock.  The edges were sponged with Desert Sand.  This was then added to the card.

Monday, April 20, 2015

Feel Better Card

Recently my mom had a knee replacement.  Then she injured a shoulder.  Then she fell and injured her other shoulder.  After her fall, I made the following card for her.  The card is 4.25 x 5.5.


I used the following to make the card:
  • Everyday Paper Dolls - Cricut Cartridge
  • Zing Clear Embossing Powder
  • Versamark
  • EZ De's 1" Rail Fence Set A stamp set
  • Misti
  • Kelly Craft Get it Straight Laser Square
  • Simon Says Stamp Stitched Rectangles
  • Cuttlebug
To make the card, I cut the images from the Everyday Paper Dolls cartridge at 4".  I used a combination of accessories.  To make the sling, I cut the arm, placed it over the body and added a triangular piece of white card.  The doll was then added to the peach card stock that was cut with a Simon Says Stamp Stitched Rectangle Die using my Cuttlebug. 

The card base was stamped multiple with the heart stamp from the EZ De's stamp set using Versamark.  I used my Misti to align the stamp for each row.  The clear embossing powder was added and then heat set.  I then used the Get it Straight Laser Square to align the image on the card base.


Monday, April 13, 2015

Mothers Day with Hero Arts

Here is another card that I made for Mothers Day:


For this card I used:
Hero Arts CG403 - Large Flower Background
Versamark
Distress Markers - Spun Sugar, Worn Lipstick, Forest Moss, Peeled Paint, Shabby Shutters
Recollections Pesto Embossing Powder
Stampendous Detailed White Embossing Powder

To make the card, I stamped the background image with Versamark, added the Detailed White embossing powder and heat set.  The flowers and leaves were then colored with the Distress Markers.  Once complete, I carefully wiped off any of the ink on the embossing.  The sentiment was stamped on vellum with Versamark, and the Pesto Embossing powder added and heat set.  The strip of vellum was then added to the image and the entire piece added to the card base.

Monday, April 6, 2015

Last Easter Card for 2015

Here is another Easter card made this year.  This card is 4.25 x 5.5.


For this card I used:
Memento Tuxedo Black and London Fog
Copic Markers Y06, Y15, Y17, R21, R81, G21, G24
Sheer Shimmer Spritz - Sparkle
Pan Pastels 956.5 - Pearlescent Green, 953.5 - Pearlescent Red, 951.5 - Pearlescent Yellow
Greenhouse Society - Tulips stamp
Close to My Heart - Just to Say stamp

To make the card, I randomly added the Pan Pastels to white card stock (cut to 2 x 4).  These were then sealed.  A third piece of white card stock was cut to 3.5 x 2.5. Using my MISTI, I stamped the Tulips with London Fog, and then colored them with Copic Markers.  The image was then spritzed the Sheer Shimmer.  This gave the final image a sparkly look to match the Pan Pastels.  All three images were then matted with yellow card stock and added to the card base.  The sentiment from Just to Say was added (again lined up using the MISTI).

Monday, March 30, 2015

Easter with Lawn Fawn

When I saw these stamps I knew I had to have them for Easter.  They arrived just in time for me to make several cards for family.

All of the cards as 4.25 x 5.5, and here they are:

 
For this card I used:
  • Lawn Fawn Eggstra Special Easter Stamps and Dies
  • Memento Tuxedo Black
  • Copic Markers: Y06, Y15, C00, C3, C5, R81, R85, YG03, YG07, E37, E35, V12, V04, B12, B16
  • Elizabeth Craft Designs Outdoor Edges
  • Simon Says Stamp Stitched Rectangles Die
To  make the card, I stamped the images, then colored with Copic Markers.  I then cut the images with the matching dies.  The grass was cut twice.  The background was cut with the Stitched Rectangles die.  All of the images were then added to the background, and then it was added to the card base.


For this card I used:
  • Lawn Fawn Eggstra Special Easter Stamps and Dies
  • Memento Tuxedo Black
  • Copic Markers: C00, C3, C5, R81, R24, R27, YG95, YG97
  • Simon Says Stamp Stitched Circles Die


To  make the card, I stamped the images, then colored with Copic Markers.  I then cut the images with the matching dies.  The background was cut with the Stitched Circles die, using double sided card stock.  The center circle was then flipped to the back side of the card stock.  All of the images were then added to the background, and then it was added to the card base.


For this card I used:
  • Lawn Fawn Eggstra Special Easter Stamps and Dies
  • Memento Tuxedo Black
  • Copic Markers: Y06, Y15, R81, R85, YG03, YG07, E37, E35, V12, V04, B12, B16
  • Simon Says Stamp Stitched Circles Die
To  make the card, I stamped the images, then colored with Copic Markers.  I then cut the images with the matching dies.  The background was cut with the Stitched Circles die, using double sided card stock.  The center circle was then flipped to the back side of the card stock.  All of the images were then added to the background, and then it was added to the card base. 


For the shaker card, I used:
  • Lawn Fawn Eggstra Special Easter Stamps and Dies
  • Memento Tuxedo Black and Teal Zeal
  • Copic Markers: Y06, Y15, C00, C3, C5, R81, R85, YG03, YG07, E37, E35, V12, V04, B12, B16
  • Assorted Sequins
  • Martha Stewart Iridescent Hearts and Stars Glitter
  • Simon Says Stamp Stitched Squares Die
To  make the card, I stamped the basket and bunny, then colored with Copic Markers.  I then cut the images with the matching dies.  The background was cut with the Stitched Squares die, and then acetate was added to cover the square.  The background of the shaker area was stamped and colored with Copic markers.  Foam tape was used around the square opening and the glitter and sequins added.  The background of the shaker was added and then the entire thing added to the card base.  The basket and bunny were then added to the card.