Pages

Saturday, December 25, 2021

Cricut, Vinyl and Ornaments

So, when you have a Cricut, some vinyl, and its near the holidays, you need to make ornaments!  Here are the ones I made this year:


I used the following:

  • 3 inch acrylic discs for keychains
  • Mod Podge
  • Glitter
  • Vinyl (white and black)
  • Ribbon
To make the ornaments the vinyl was cut using various images from Cricut Design Space.  Mod Podge was added to one side of the ornaments and glitter added on top.  After it was dry, I repeated it so that there was a good thick coverage of glitter.   Once dry the vinyl images were added to the other side and ribbons added to complete the ornaments!

Monday, December 20, 2021

Cricut Christmas Card

One of the options I now have using Cricut Design Space is to just draw the image.  So I tried it and here is the result:

I think that I will be making several cards this year using this method!  Its quick especially when you are short on time!  

Monday, December 13, 2021

Combining Blue Knight Rubber Stamps sets and creating backgrounds

I decided to create backgrounds for a Blue Knight Rubber Stamp - Seasonal Woodland.  For one card, I used Distress Inks, for the other Pan Pastels.  I definitely liked creating the background with Pan Pastels better, I was able to work with them and until I got the look I liked.  I liked the  Distress Ink background but it was harder to add and move the color.

I also decided that just the Seasonal Woodland stamp wasn't enough!  So I added the Horse and Sleigh stamp.  Here are the cards I made (the Pan Pastel background is the lighter one):


I used the following for the cards:

  • A variety of Pan Pastels or a variety of Distess Inks
  • Blue Knight Rubber Stamps - Horse and Sleigh stamp set
  • Blue Knight Rubber Stamps - Seasonal Woodland stamp set
  • White Gel pen
  • VersaFine Onyx Black Ink
  • VersaMark
  • Stampendous Detail White Embossing Powder
  • Gina K - Sentimental Holiday Stamp Set
  • Gina K - Master Layouts 1
To make the cards, I created the sky background for one card using Pan Pastels and for the other Distress Ink.  I then stamped the Seasonal Woodland Stamp with VersaFine Onyx Black ink.  The image was then cut with the Gina K Master Layouts 1 die (and the associated black mat was cut).  The Horse and Sleigh was then added to the cards using the VersaFine Onyx Black Ink.  The grassy area was then colored.  I used a white gel pen to add a bit of fallen snow. The sentiment was stamped with VersaMark, embossing powder added and heat set.  The image was then matted with black and added to the card base to complete the cards.

Monday, December 6, 2021

BKRS Horse and Sleigh Christmas Card

When I saw the Horse and Sleigh stamp set from Blue Knight Rubber Stamps I immediately knew how I wanted to use it! The design I had in mind is perfect for mass producing cards, which is helpful  when lots of cards are needed.  The Horse and Sleigh stamp set contains the same image in three different sizes.  The medium size was perfect for the card:


I used the following for the card:

  • Blue Knight Rubber Stamps - Horse and Sleigh stamp set
  • VersaFine Black Onyx Ink
  • Distress Oxide Ink - Salted Ocean, Prize Ribbon
  • Gina K - Complements of the Season stamp set
  • Gina K - Master Layouts 1
  • Perfect Pearls - Perfect Pearl 
  • White Gel Pen
To make the card the card I masked the bottom and top portions of a piece of white card stock leaving the unmasked area large enough for the stamp.  Into the unmasked area I blended the Distress Oxide Inks keeping the lighter color toward the top.  Perfect Pearl was mixed with water in a small mister, and the inked area was misted with this combination, resulting in a slight glimmer in the inked area.  Once dry, the masks were removed and the image stamped.  A little bit of white was added with the gel pen.  This panel was then cut with Master Layouts 1 (along with a black mat using the associated die),  The panel was added to the mat and the entire piece added to a card base.  I then found the perfect sentiment for the card from a Gina K stamp set.  This was stamped in the upper corner to complete the card.

Monday, November 29, 2021

80th Birthday Card

So I needed to make a card for a soon to be an 80 year old!  I didn't want to to the typical flower card for this momentous birthday.  I decided to go a different route:

For this card I used:

  • Hero Arts - Script Bold Print Background Stamp
  • Hero Arts - Number Candles and dies
  • Hero Arts - Color Layering Cupcake and dies
  • Clearly Besotted- Tiny Type Stamp set
  • Gina K - Master Layouts 1 and 3
  • Gina K Inks - In the Navy, Sea Glass, Blue Lagoon, Kraft, Dark Chocolate, Brown, Onyx, Sandy Beach, Soft Stone, Whisper, Wild Dandelion
  • Altenew Inks - Butter Cream, Frosted Pink, Cotton Candy
  • Wink of Stella - Clear
  • Glossy Accents
  • Action Wobble
To make the card, I stamped the cupcakes using a variety of inks using a light and darker color for each area.  Wink of Stella was added to the frosting for a bit of sparkle. These were then cut with the associated dies.  The numbers were stamped with a light and darker color blue, the flames in yellow, and then all cut with the associated dies.  Glossy Accents was added to the flames and the melted portion of the number candles. The sentiment was stamped, and cut with one of the flag dies from the Master Layouts 3 set.  The dark blue in the background was stamped with the Script Bold Print background and then cut with a dies from the Master Layouts set 1.  Everything was then added to the card base, using an Action Wobble for the center cupcake to complete the card.

Monday, November 15, 2021

Iron On Vinyl

The Cricut Explore came with a sheet on iron on vinyl, as well as some removable vinyl.  I had never used either, so I cut a few images with the removable vinyl, added them to my Cricut and craft cabinets.  I had extra aprons so I used them with the iron on vinyl.  The included vinyl was black and the apron was dark blue which made the vinyl on the finished piece hard to see, but for a first try, I thought it came out OK.


I decided that I wanted to try more of the iron on vinyl, so I bought some in white, and made these two designs:


Using vinyl and iron on vinyl is fun, and I can see using it to make Christmas gifts.  Perhaps personalized aprons, ornaments, the options are endless!

Monday, November 8, 2021

Happy Birthday card with Hero Arts and Picket Fence Studios

This birthday card did not come out exactly as planned but I really like the end result.  The original plan was to stamp the sentiment on velum and fussy cut it - but I could not cut it to my liking.  So this card is the "new plan".  Where I covered the entire panel with the stamped velum! 


I used the following for the card:
  • Hero Arts - Candles Bold Prints
  • Hero Arts - Unicorn White Pigment Ink
  • Prismacolor  Colored Pencils
  • Picket Fence Studios - Happy Happy Happy Birthday Stamp
  • Versamark
  • Stampendous Detailed White Embossing Powder
To make the card, I stamped the Candles on a piece of dark blue paper with the white pigment ink.  Once the ink was dry, I colored the candles with Prismacolor pencils.  Apiece of velum was stamped with Versamark, embossing powder added, and heat set.  This was added to the main panel along one side only.  The entire piece was then added to a card base to complete the card.

Monday, November 1, 2021

Art Impressions Fall Wreath

I have wanted to get back and use my Art Impression Watercolor Stamps and making a Fall wreath seemed like a perfect opportunity.  Between the pumpkins and fall colors this makes a perfect wreath for the autumn season.


I used the following for the card:
  • Art Impressions Watercolor stamp sets - Foliage (#4051), WC Series 3 (#4056), Foliage #3 (#5007), Flowers (#4052), Branches (#4964)
  • Gina K - Master Layouts 3
  • Marvey Markers - Sepia (#45), Brilliant Yellow (#43)
  • Tombow Markers - Dark Jade (#177), Scarlet (#926), Avocado (#098)
  • Gina K - Dark Sage
  • Sentiment - from an unknown set.
To make the card, I traced a circle on a piece of watercolor paper.  I then stamped the images going around the circle, and added water for that water color look.  The image and associated mat were then cut with the Master Layouts 3 dies.  The sentiment was stamped with Dark Sage ink,  The image was attached to the mat and the entire piece added to a card base to complete the card.  


Friday, October 29, 2021

Batty Halloween Card

This card uses a variety of items from many different manufactures.  I knew I had to use the bat from Best Witches, and the rest of it just came together with items I had in my stash.


 I used the following for the card:

  • Gina K - Best Witches dies
  • Gina K - Black Onyx Ink
  • Gina K - Master Layouts 1
  • A Colorful Life - Ghosties Stencil
  • Recollections - Halloween Phrases
  • Distress Oxide Ink - Seedless Preserves, Carved Pumpkin, Lucky Clover
To make the card, I used blender brushes to add the Distress Oxide to white card stock.  The stencil was then placed on the panel, and a damp paper towel as added on top and lightly pressed into the stencil.  This removed some of the ink from the panel and made it look "ghostly". The panel was cut with Master Layouts 1 (along with the associated black mat).  Bats were cut from black cardstock with the die from Best Witches.  These were added to the panel, with some of the bats added with foam squares.  A white gel pen was used to add eyes to the bats.  The sentiment was added using Black Onyx ink (interesting that it ended up looking blue in the picture!).  The panel was then added to the black mat, and the entire piece added to the card base to complete the card. 

This card was entered in the Mod Squad Challenge - Halloween

Wednesday, October 27, 2021

Pumpkin Halloween cards with Gina K Best Witches

These cards were made with the Best Witches stamp set from Gina K.  The pumpkin in the set is so cute, especially when the witches hat is added.


For these cards, I used:

  • Gina K - Best Witches stamp set and dies
  • Gina K - Master Layouts 1
  • Gina K Ink - Obsidian, Tangerine Twist, Slate, Stormy Sky, Soft Stone, Wild Lilac, Lovely Lavender
  • Action Wobbles

For the first card, I cut the white panel (and black mat) with Master Layouts 1.  The Witches hat outline was stamped in Obsidian, and the solid portion stamped in Slate.  The hat was masked, and the pumpkin outline was stamped in Obsidian.  The solid portion of the pumpkin was stamped in Tangerine Twist.  The mouth and eyes were stamped in Obsidian.  A spider was added to the corner, with the outline stamped in Obsidian, and the solid portion in Stormy Sky.  A white gel pen was used to add the eyes.  The sentiment was stamped with Tangerine Twist, and orange and black ink splatters added.  This panel was added to the black mat and the entire piece to the card base to complete the card.

For the second card, the pumpkin outline was stamped in Obsidian, the solid portion with Tangerine Twist, and the mouth and eyes with Obsidian.  The witches hat outline was stamped with Obsidian, and the solid portion with Slate.  Both these images were cut with the associated dies.  I cut a panel of white card stock (and black mat) using Master Layouts 1.  "Wood Graining" was added to the white panel using Soft Stone and a bit of Lovely Lavender ink on the white panel.  This panel was added to the black mat.  The same technique was used on another piece of white card stock. Using Master Layouts 1 the oval was cut out of the piece and the scalloped oval black mat was also cut. These were attached together. The long rectangle was cut from purple glitter paper, and the associated mat cut from black paper these were attached together and then added to the "wood grained" panel.  The oval was added.  The witches hat was attached to the pumpkin, and then added with an action wobble.  The entire piece was added to the card base to complete the card. 

Monday, October 25, 2021

Gina K Halloween Cards with Best Witches

OK, so when I first saw the Best Witches Gina K stamp set I knew I had to have it.  I love making Halloween cards for the grandkids and this was a cute set that would make great cards.  I had some ideas and while waiting for the set to arrive, I watched a few videos from Cathy Zielski using the set.  Her cards were SO CUTE, I had to use the basics (ok - copied) for my own cards.  Here are the cards made with the ghost image from the set.


For these cards, I used the following:

  • Gina K - Master Layouts 1
  • Gina K - Best Witches Stamps and Dies
  • Gina K Ink - Black Onyx, Soft Stone, Sweet Mango, Key Line, Wild Lilac
  • Action Wobbles
  • Foam Squares
  • Black Card Stock
  • White Card Stock

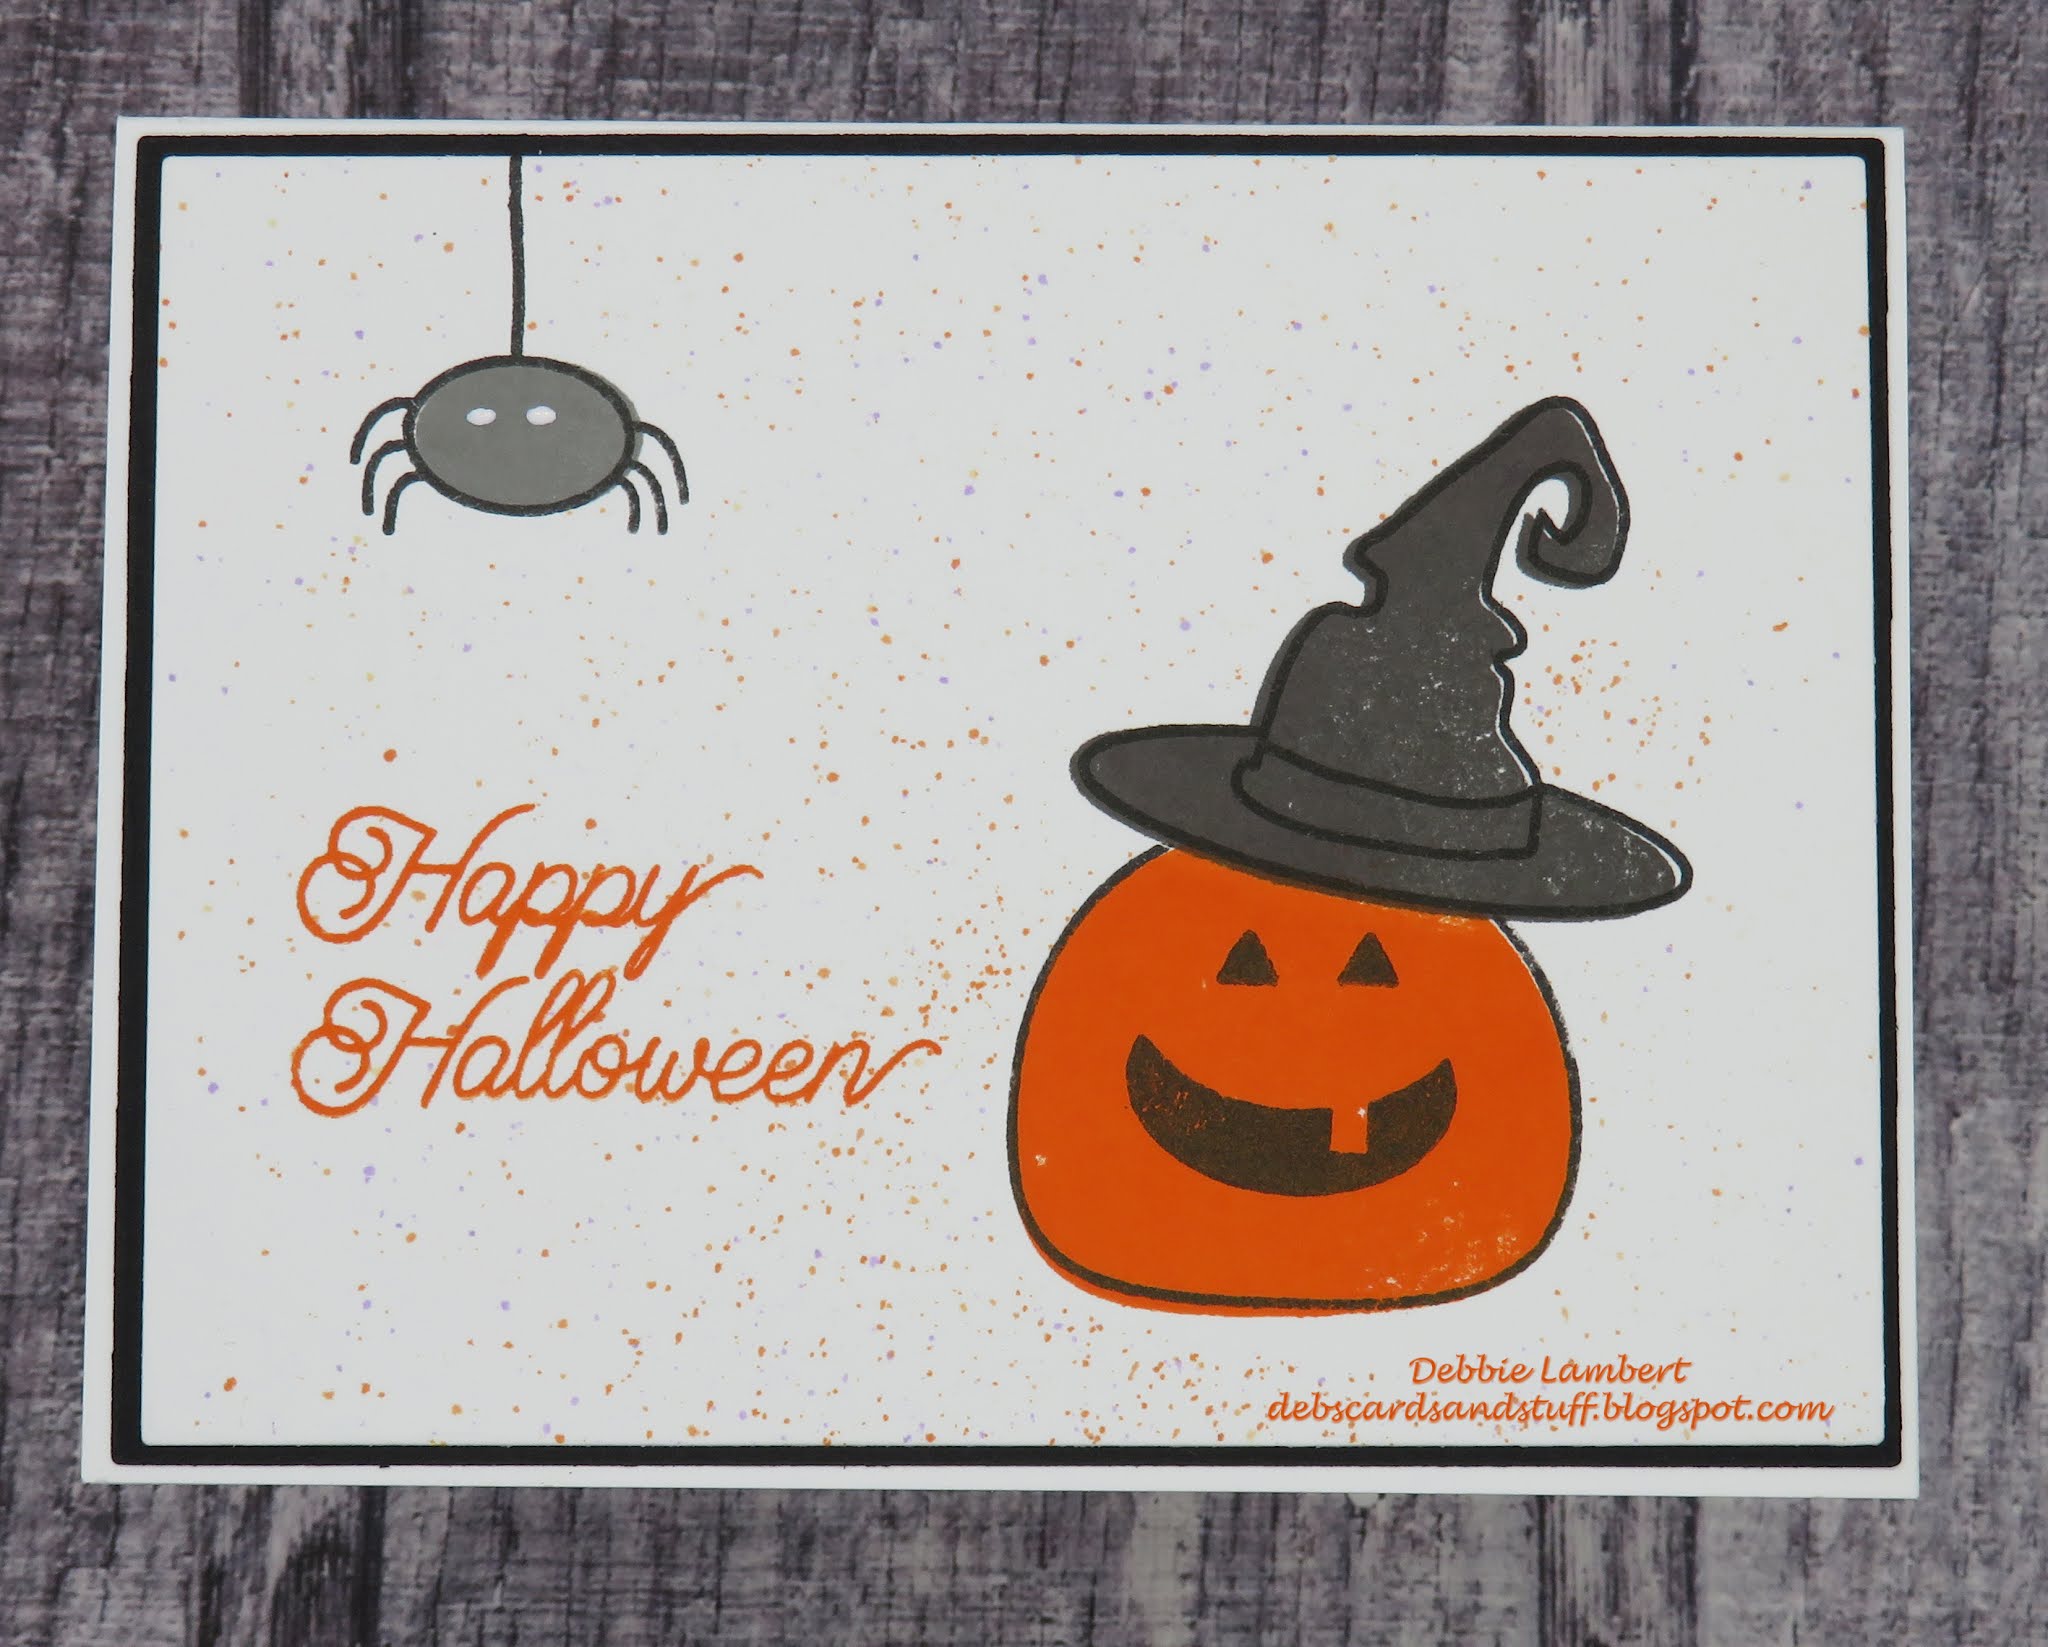
For the first card, I stamped the images, and then cut them out with the matching dies.  I then added the mouth and eyes.  I then cut a piece of white card stock (and black mat) with Master Layouts 1.  With the white piece, I added spider webs in the corners, and splattered some orange, green and purple ink.  The sentiment was added in black.  Using foam squares, the orange and purple ghosts were added.  An action wobble was used for the green ghost.  This was then added then added to the black mat and the entire piece added to to card base to complete the card.

For the second card, I cut a piece of white card stock (and the black mat) with Master Layouts 1.  The ghosts were stamped on the white cardstock.  The black outline was added to the ghosts but offset a little.  The mouths and eyes were then added.  The sentiment was added beneath the ghosts.  I then added splatters of green, orange and purple ink.  This panel was then added to the black mat and then to the card base to complete the card.

Saturday, October 23, 2021

Cricut Halloween Card

One thing that I like about Design Space is Cricut Access.  With Cricut Access I now have access to so many images (200,000+) and fonts (500+)!  It's almost overwhelming.  This card was one of the Halloween images that I now can can access.  The image was cut from black cardstock and orange metallic cardstock was added behind it.  Simple.  


Thursday, October 21, 2021

More Circut Birthday and Anniversary cards

I tried several more cards that were available in Cricut Design Space.  Design Space isn't all that hard, and there are a lot of options that I still need to try.  Design Space is so much better than just using the cartridges, there are just so many more options in cutting the images.  I'm glad I finally upgraded my machine!


Monday, October 18, 2021

So I got a new Cricut machine ....

I needed to get a new Cricut machine.  The size dial on my very old one, the Cricut Expression was no longer working .  I normally ise my Cricut mainly for scrapbooking, and occasionally card making.  Since I needed to try out Design Space, I made this card:


And this card uses the remaining pieces which I carefully put into place.  (I don't think I'll do this again, not an enjoyable process for me!) 


Monday, August 9, 2021

Mallard Pair Birthday Card

This was my husbands birthday card.  He loves the outdoors, so this card fit him perfectly. I used a stamp from Northwoods Rubber Stamps, which has great outdoorsy stamps.


For this card, I used:

  • Northwoods Rubber Stamps - Mallard Pair In Notched Square
  • My Favorite Things - Old Things
  • Gina K - Master Layouts 3
  • Copic Markers - Various Colors
  • Wink Of Stella - Clear
  • Gina K - Jet Black Amalgam Ink
To make the card, I stamped the image with Jet Black Amalgam ink on Copic friendly paper.  The image was then colored with various Copic markers.  Wink of Stella was added to the water to give it a sheen, which unfortunately can't bee seen in the photo.  The image was fussy cut and added to a blue mat, cut using one of the square dies from Master Layouts 3.  The image with its mat was added to a green card base, and the sentiment added to complete the card. 

Monday, August 2, 2021

Thank You Cards with Gina K Sketched Flowers

I needed a bunch of Thank You cards recently, and of course I needed to make them!  I decided to use a new Stamp set from Gina K - Sketched Flowers for the cards.  I kept the cards fairly simple, just changing the flower colors.


For these cards I used:

  • Gina K - Sketched Flowers Stamp set
  • Gina K - Master Layouts 4
  • Gina K Ink - Black Onyx, Fresh Asparagus, Warm Cocoa, Wild Wisteria, Lovely Lavender, Sea Glass, Blue Lagoon, Lemon Drop, Wild Dandelion, Tangerine Twist, Sweet Mango, Bubblegum Pink, Passionate Pink, Lipstick, Red Velvet, Dark Chocolate
To make the cards, I first cut the panel with scalloped edge rectangle in Master Layouts 4.  I did this first so that I could figure out the layout.  I used a stamp positioner (Misti), allowing me to reproduce these cards rapidly, with the same layout for each. Once the images were stamped, the panel was added to a card base to complete the cards.  


Monday, July 26, 2021

Christmas In July - part 2

I loved a card that was made by Mindy Eggen (see her card here), and knew I needed to make it myself.  My version is similar:


For the card, I used:

  • Gina K - Red Velvet Ink
  • Gina K - Deck the Halls Stamp set
  • Gina K - Master Layouts 1
  • Versamark
  • Stampendous - Detail Gold Embossing Powder
  • Gansai Tambi - #902 Red Gold
  • Gold Metallic Paper
To make the card, Christmas Balls were stamped using Red Velvet.  Once the ink was dry, The decorations, caps, strings and sentiment were stamped using Versamark.  Embossing powder was added and het set.  Watercolor splatters were added using Red Gold watercolor. The image and gold mat were cut using the Master Layout dies.  The image was attached to the gold mat, and then added to the card base to complete the card. 

Monday, July 19, 2021

Christmas in July (Gina K)

OK, so I got on the Christmas in July bandwagon this year, partly because I got this wonderful stamp set last year, but too late to use for Christmas cards.  Its from Gina K Designs and is called Sparkle and Shine.  

Here are three of the cards I made using it:


To make the cards I used:
  • Versamark
  • Gina K - Sparkle and Shine
  • Stampendous - Detail Gold Embossing Power (Red and Green cards)
  • Stampendous - Detail White Embossing Powder (Blue card)
  • Gansai Tambi - #903 Yellow Gold (Red and Green cards)
  • Gansai Tambi - #906 White Gold (Blue card)
  • Gina K - Red Velvet, Edible Eggplant (Red Card), Grass Green, Christmas Pine (Green Card)
  • Gina K - Master Layouts 1
  • Gold and Silver metallic paper
To make the cards, I stamped the main image in Versamark, added embossing powder and heat set.  The sentiments were stamped in Versamark, embossing powder added and heat set. For the Red and Green cards, darker color was brushed around the image, and then an even darker color was added at the edges. Watercolor splatters were then added.  These panels, and associated mats were cut with Master Layouts 1 dies.  The panels were attached to the mats and then to the card base to complete the cards.


Monday, July 12, 2021

Sailboat Window View

 I gave this card to my Husband for Father's Day, but it could be used for a Birthday card as well.  

For the card, I used:

  • Gina K - By the Sea 2
  • Simon Says Stamp - Waves Stencil
  • Distress Ink - Stormy Sky, Tumbled Glass, Mermaid Lagoon, Squeezed Lemonade
  • Memory Box - Grand Madison Arched Window
  • Acetate
  • Prismacolor Colored Pencils
To make the card. I cut the window twice, once from a wood grained brown card stock, and once from a wood grained yellow card stock.  I then pieced the brown window frame into the yellow paper, and attached it using a little bit of tape.  Acetate was added to the window. Using the stencil and the blue distress inks, the water was created on a piece of white card stock.  I then created the sun with a blending brush.  The sailboat was stamped on white card stock, and colored with colored pencils.  It was fussy cut and added to the background piece. Foam tape was used to attach the background to the window.  This was then added to the card base to complete the card.

Challenges:
Simon Says Stamp Monday Challenge  - Lazy Days Of Summer

Monday, July 5, 2021

Glittery Birthday Balloons

This card was fun to put together!  Its based on a technique seen on one of Jennifer McGuire's videos - Sparkled Glass Technique.  Luckily, I have so much glitter that I was able to create the glitter background as well.

For the card I used:

  • Heat resistant acetate
  • Sugar Pea Designs - Birthday Balloons
  • Altenew - Birthday Greetings
  • Sookwang Double Sided tape
  • Glitter Ritz - Silver
  • Copic Markers - Red, Green, Blue
  • Gina K Ink - Blue Denim, Lucky Clover, Red Velvet
  • Versamark
  • Stampendous - Detail White Embossing Powder
  • Rectangle dies
To make the card, I cut a piece of acetate to 4.25x5.5.  The balloons were stamped on the acetate with Versamark, embossing powder added and heat set.  On the back side of the embossed acetate, the balloons were colored with Copic markers. The acetate was added to a white frame cut with rectangle dies.  I created the silver glitter background by adding Sookwang tape to a piece of white card stock. The liner sheet was removed, glitter added to the tape and burnished in.  The glitter piece was trimmed to the same size as the frame.  Using foam tape, the acetate piece was attached to the glitter piece, and then the entire piece added to the card base.  The sentiment was stamped using similar colors of ink to the Copic markers, trimmed to size and added to the acetate to complete the card.

Monday, June 28, 2021

Butterfly Birthday Card

 I decided to use some simple masking and ink blending to create a card.  Here is the end result:


I used the following to make the card:

  • Gina K Ink - Blue Raspberry. Grass Green, Wild Dandelion, Black Onyx
  • WPlus9 - Flora & Fauna Stamp Set
  • Gina K - Master Layouts 1
  • Altenew - Birthday Greetings
To make the card, I masked a strip on a piece of white card stock.  The ink was then added using blending brushes.  The masks removed, and the butterflies added.  The sentiment was stamped just below the ink blended area.  This panel was cut using one of the Master Layout dies (the mat was cut using the associated die).  The panel as added to the mat and the entire piece added to a green card base to complete the card.

Monday, June 21, 2021

Happy Dads Day!

I've had this idea for a while - to create a wood grained background, and then use a stencil over it.  I gave it a shot for the card I made for my Dad.  Here is the card:


I used the following for the card:

  • Gina K Ink - Warm Cocoa, Fark Chocolate, Charcoal Brown, Tranquil Teal, White Pigment
  • Altenew - Leaf Burst Stencil
  • Hero Arts - Fathers Day stamp set
  • Gina K - Mater Layouts 2 and 3
To make the card, I first created the wood grained background.  This is based on a technique that Gina K has shown in several videos.  Kraft card stock was cut using one of the Master Layout 2 dies (the mat was cut using the associated die).  This was then scored every 1/2 inch.  The ink pads were dragged down the scored panel to create the wood grain.  Blue was added lightly to give an aged appearance.  The stencil was placed in the upper corner and using a sponge dauber the white ink added.  Once dry, the panel was added to the mat, and then to a Kraft card base. Using Master Layouts 3, a circle and associated mat were cut.  The sentiment was stamped, the two pieces attached together, and added to card.

Monday, June 14, 2021

Mandala Burst Happy Birthday Card

I've wanted to use the Mandala Burst stencil for a while.  So I created a background using it, then decided to use it for this card:


 I used the following for the card:

  • Gina K Ink - Blue Raspberry, Wild Dandelion, Grass Green
  • Gina K - Mandala Burst Stencil
  • Gina K - Master Layouts 1
  • Creative Expressions - Happy Birthday die
  • Altenew - Birthday Greetings Stamp set
To make the card, I used the stencil, and starting in the center of the stencil, added Wild Dandelion ink with a blender brush.  I followed that with Grass Green and finally Blue Raspberry.  The stenciled panel was then die cut using one of the Master Layouts 1 dies.  A black mat was also cut with the associated die.  The stenciled panel was attached to the mat, and then the entire piece added to a yellow card base.  I die cut the Happy Birthday Sentiment and added that to the stenciled panel.  Since this card was for a missed birthday, I added the belated stamp to complete the card.

Monday, June 7, 2021

Love card

I really like the flowers from Gina K Designs Watercolor Flowers stamp set.  I used two of the flowers to make this card.   

I used the following to make this card:

  • Gina K - Watercolor Flower Stamp set and dies
  • Gina K - Master Layouts 4, Small and Large circle dies
  • Gina K - Lucky Clover, Wild Dandelion, Tangerine Twist, Red Hot Ink
  • Gina K - Angel Aura Rhinestones
  • Distress Ink - Broken China
  • Picket Fence Studio - Floral Damask Stencil
  • Cricut - Love (Home Accents)
To make the card, I stamped the flowers and stems from the Watercolor Flowers stamp set onto white card stock.  These were then cut with the associated dies.  The circles were cut from white and blue cardstock using the Small and Large circle dies.  The background was created using the Floral Damask stencil and the distress ink.  This was then cut using the scalloped rectangle from Master Layouts 4. Using foam tape the background was attached to the card base.  The flowers were arranged on the circle and attached.  The white circle and blue circle were attached together and added to the background.  Something was still needed, so I cut the love sentiment using my Cricut and attached it to the card.  I felt that something was STILL missing, so the Rhinestones were added. I decided to stop at that point and call the card complete!

Monday, May 31, 2021

Rainbow Birthday Card

I've been using my Gansi Tambi watercolors a bit more these days.  I created a rainbow with some of the colors in my set, comparing how the colors look using different amounts of water.  Of course I had to make cards with my results!  And here they are:


I used the following for the cards:

  • Gansi Tambi Watercolors (I used  a red, orange, yellow, green, blue and purple from the set)
  • Gina K - Master Layouts 1 and 2 die sets
  • Simon Says Stamp - Happy die
  • Altenew - Birthday Greetings stamp set
  • Gina K - Black Onyx Ink
To make the cards, I watercolored the stripes using the rainbow colors from the watercolors.  I first used just a minimum amount of water, and then repeated it using a very watered down watercolor.  These were both then cut using one of the Master Layouts 2 dies.  The mat was cut from dark blue paper using one of the Mater Layouts 1 dies.  The watercolor panel was attached to the mat. The 'happy' was cut using the same blue and the 'happy' background from white.  These were added to the watercolor panel.  'birthday' was stamped below the word happy.  The entire panel was then added to the card base complete the card.