Pages

Showing posts with label Tim Holtz. Show all posts

Saturday, July 8, 2023

Happy Anniversary

I have paper from the Crafters Consortium which looks like gorgeous alcohol ink backgrounds.  I am always looking for ways to use it.  Here I used it for an Anniversary Card.


I used the following for the card:

  • Crafters Consortium - Paper - Ink Drops Candy
  • Gold Paper
  • Time Holtz - Skeleton Leaves
  • Gina K Designs - Wild Lilac Ink
  • Picket Fence Studios - Words to Say Happy Anniversary Stamp
To make the card, I cut strips of the paper and attached them to the card base using foam tape.  Using foam tape provided a bit of dimension to the card. The leaves were cut using gold paper and attached to the card.  The sentiment was stamped and added to complete the card. 


Monday, September 5, 2022

Leafy Birthday card

I'm still making mini slimline cards.  I really like the size.  These cards were very easy to put together, a few die cuts and a stamp!

I used the following for the cards:

  • Gina K - Wild Blossoms Stamp Set
  • Gina K - Watercolor Floral paper pad
  • Gina K - Fresh Asparagus Ink
  • Gina K - Master Layouts 7
  • Tim Holtz - Skeleton Leaves Dies
To make the cards, I cut the patterned paper from the Watercolor Floral paper pad using Master Layouts 7.  I also cut the green mats.  The leaves were cut using the same color green card stock as the mat.  I cut a piece of white paper to fit in the center.  The patterned paper was added to the mat, the entire piece added to the card base.  The white rectangle added, followed by the leaf.  The sentiment was added to complete the card.


Monday, June 20, 2022

Retiform Technique

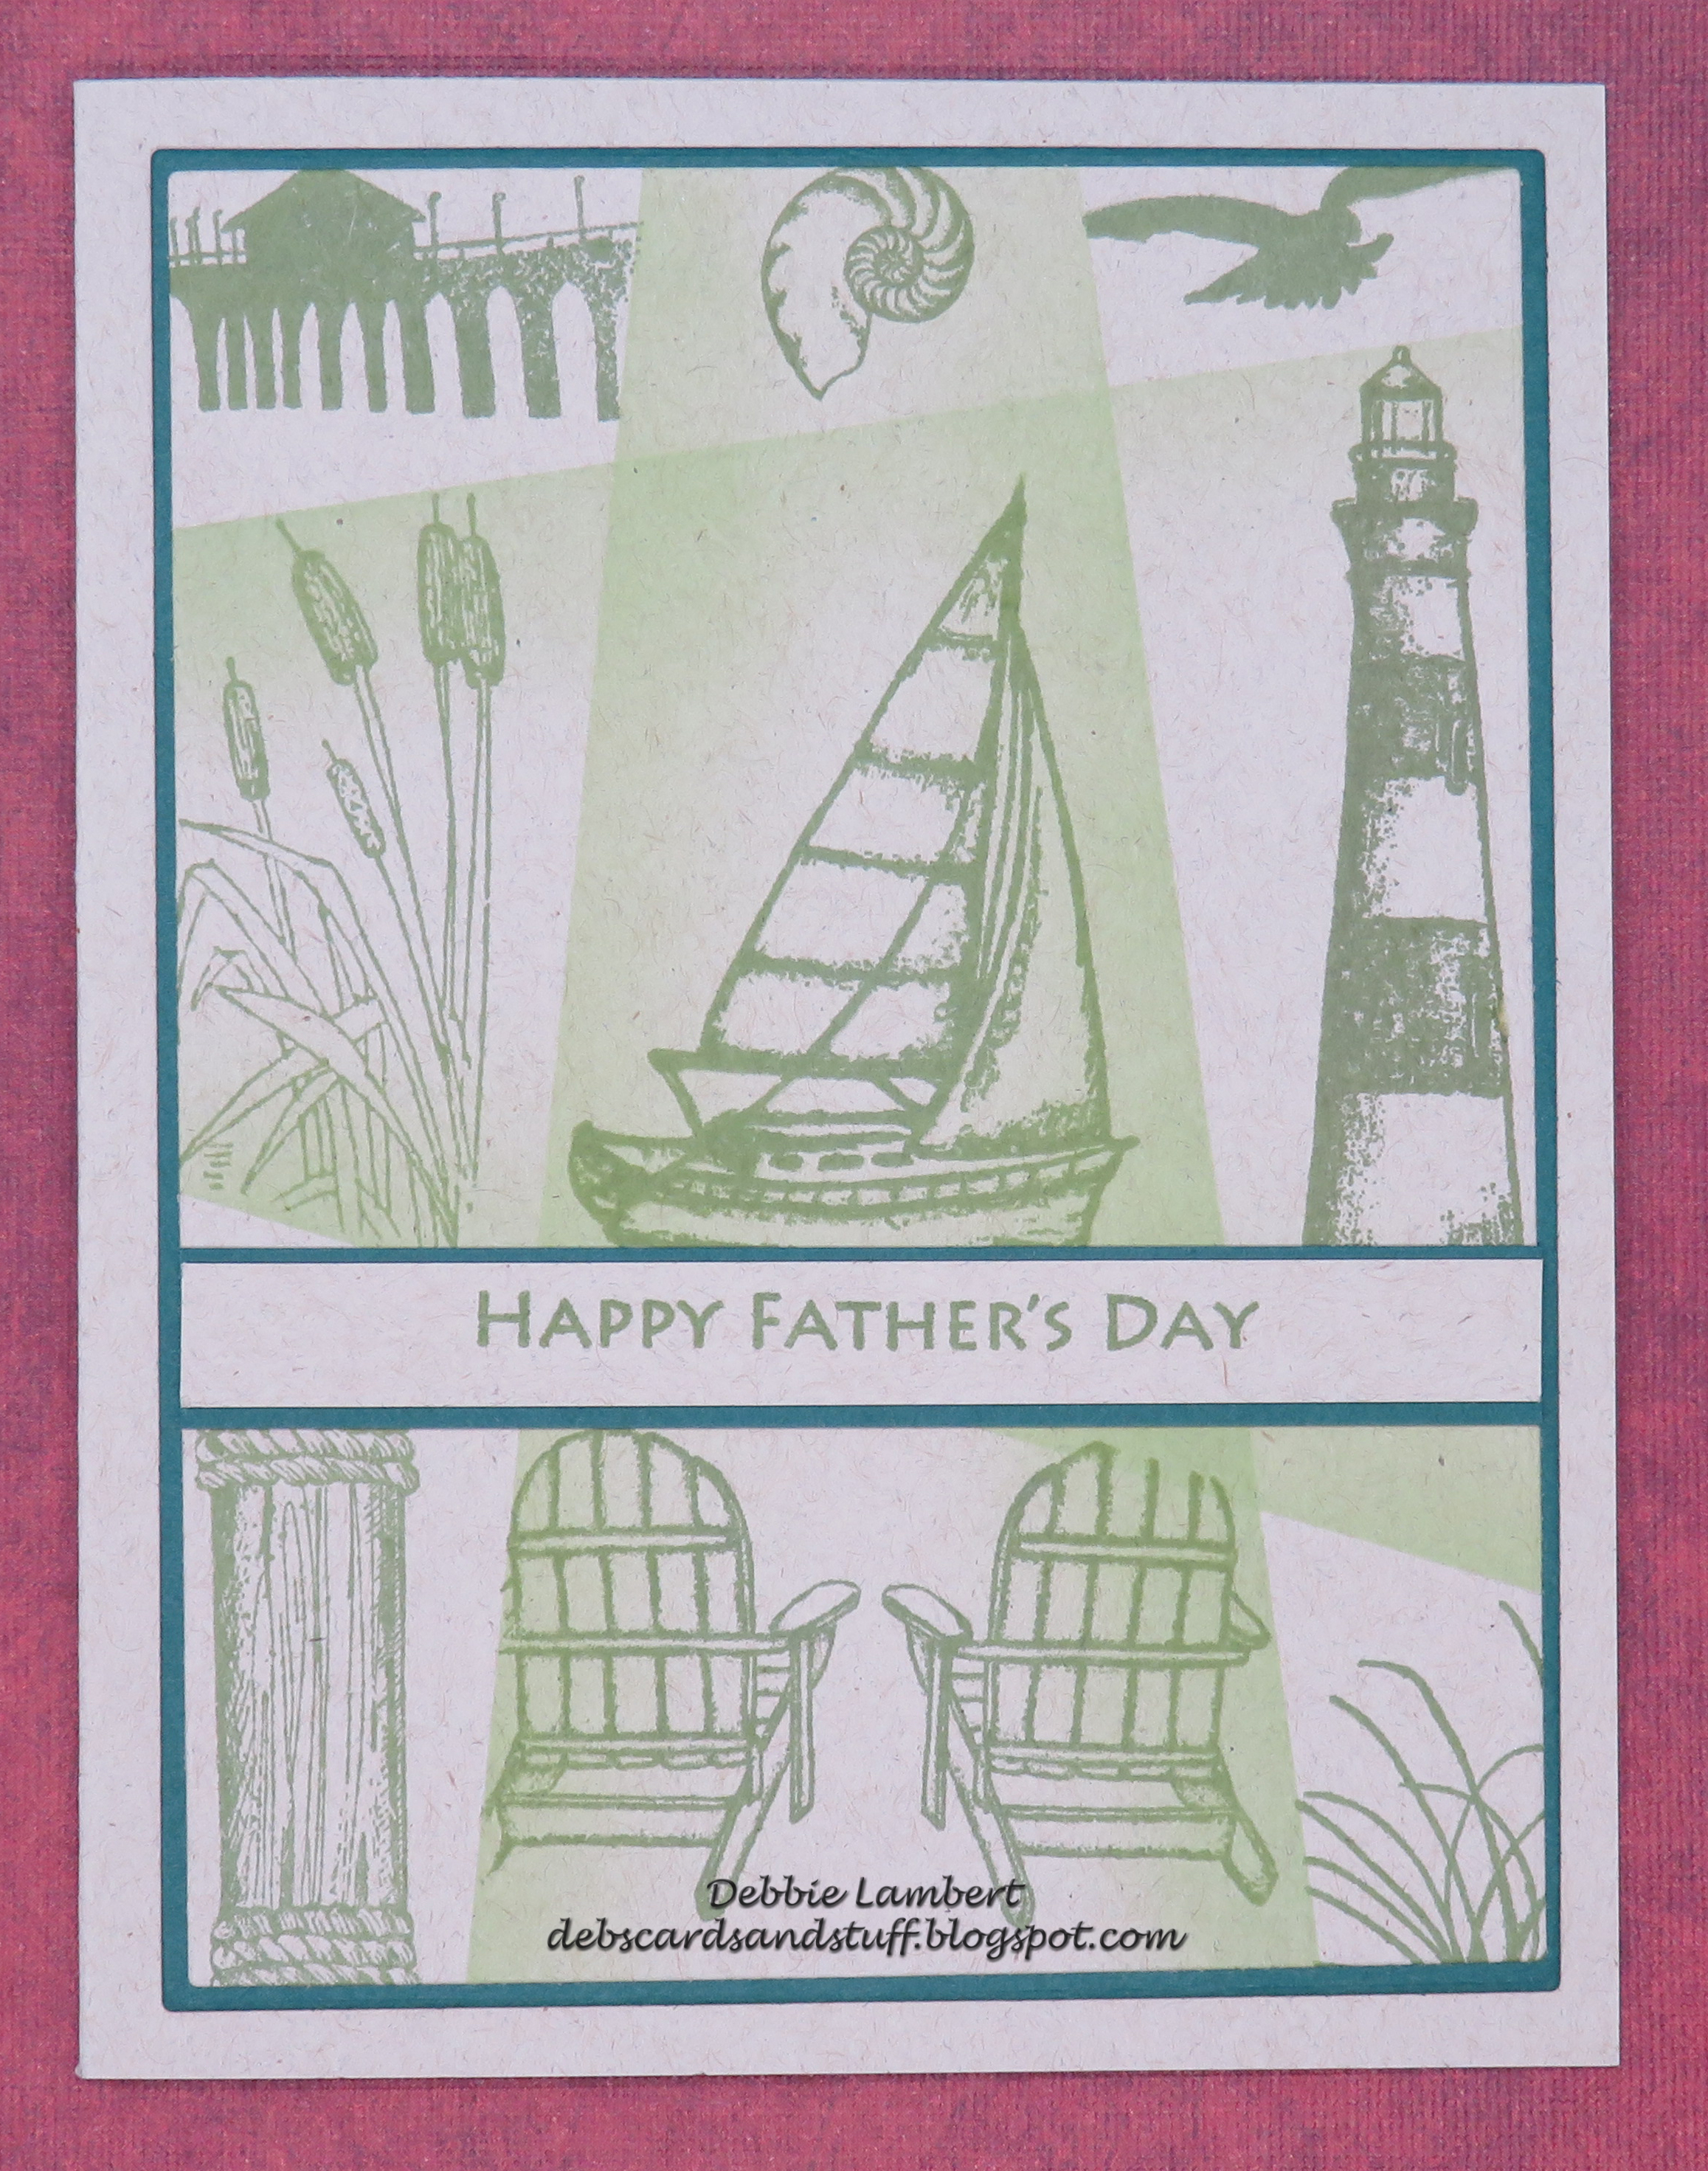
A few weeks ago, I saw a Gina K YouTube video where she did a technique called Retiform.  I gave it a try for some Fathers Day cards and this is how they came out:

To make the cards I used the following:

  • Gina K - Vertical Greetings, Wetlands 2, By the Sea 2 
  • Seaside Stamping Ink - Beach Stories Too 
  • Stamping Up - By the Tide
  • Local King Rubber Stamps - Seaside, Rough Rider
  • Close To My Heart - Enjoy Life
  • Tim Holtz - Hear and There
  • Hero Arts - Sandstone, Cocoa Ink (Brown Card)
  • Gina K - Fresh Asparagus, Grass Green (Green Card)
  • Gina K - Stormy Sky, Soft Stone (Gray Card) 
  • Gina K - Blue Denim, Powder Blue (Blue Card)
  • Gina K - Master Layouts 1
To make the cards, I masked areas and using a blending brush added ink to create the background areas.  This was done with the lighter of the ink colors.  I then stamped the images from the various stamp sets into the areas using the darker colored inks making sure to mask the area first.  The image was then cut (along with the mat) using Master Layouts 1.  The image was added to the mat, and then the entire piece to the card base.  The sentiment was stamped, matted and added to the card.

Here are some close ups of the cards:


Monday, March 22, 2021

Hands of Love Birthday Card

 This was a fun card to make.  I've had the stencil for a while, and wanted to use it.  The hand stamps fit so perfect that they had to be used as well.  It was then just finding a sentiment that would fit into the hands.


I used the following for the card:

  • Gina K - Master Layouts 2
  • Gina K - Hands of Love Stamp set
  • Gina K - Black Onyx Amalgam Ink
  • MFT - Delicious Birthday Stamp set
  • Tim Holtz - Rays Stencil
  • Distress Ink - Dried Marigold, Ripe Persimmon, Squeezed Lemonade, Mustard Seed, Wild Honey
To make the card, I placed the stencil on my paper and using my blending brushes added the distress ink from lightest to darkest.  The image was then cut using the Master Layouts dies (along with the black mat).  I then stamped the hands and sentiment using the Onyx ink.  Everything was then attached to the card base to complete the card.

Wednesday, December 2, 2020

Christmas Cards using Gina K Master Layouts

I made several cards using all three of the Master Layout die sets from Gina K.  I think that these ended up being one of my more favorite card designs this year!  The sentiment stamps from Tim Holtz fit the style of the paper and cards so well, and fit within the Master Layout 1 ovals.


I used the following to make the cards:

  • Gina K - Master Layout sets 1, 2 and 3
  • Gina K Ink - Christmas Pine, Red Velvet, Powder Blue
  • Gina K - Seasons Greetings Stamp patterned paper
  • Tim Holtz - Mini Doodle Greetings Stamp Set

Tuesday, October 27, 2020

Autumn Greeting!

I like Autumn.  I like Autumn so much that I have a large collection of stamps and dies for fall that are not Halloween related.  Here is a card that I made using those supplies:


To make the card, I used the following:

  • Gina K - Foilmates - Autumn Leaves
  • Deco Foil - Amber Watercolor
  • Tim Holtz - Metallic Kraftcore Paper
  • Tim Holtz - Skeleton Leaves Dies
  • Versa Mark
  • Stampendous - Detailed Black Embossing Powder
  • Gina K - Master Layouts 1
To make the card, I foiled the Autumn Leaves paper with the Amber Watercolor foil.  This was then trimmed to size using the smaller of the Master Layouts dies.  The foiled image was matted with black card stock cut to size using the larger of the Master Layouts dies.  This was then added to card base.  The leaves were cut from the Metallic paper and added to the card.  The greeting was then stamped on a piece of the metallic paper with Versa Mark, embossing powder was added and heat set.  This was then matted with black and added to the card completing the card.

Monday, June 15, 2020

Fathers Day Cards using the Gina K Carved Wood technique

When I saw the Carved Wood technique on one of the Gina K Stamp and Chat videos, I knew I needed to try it for myself.  I also figured it would lend itself to masculine cards.

This technique involves embossing a stencil, adding the score lines (for the wood planks) and using using ink pads to create the wood grain.  The biggest problem I had with this technique was choosing which side to use for the card! Here are the front and back of the two pieces I made:


I ended up using the front for both cards I made.


I used the following to make the "Car" card:
  • Crafters Workshop - Mini Gears Stencil
  • Gina K Ink - Soft Stone, Stormy Sky, Slate, Charcoal Brown
  • Tim Holtz - Here & There Stamp Set
  • Gina K - By the Sea 2 (for the sentiment)
  • Gina K - Single Stitched Oval Dies
  • Gina K - Charcoal Brown Card Stock
  • Twine
For the second card I used:
  • TWC - Mini Climbing Vine Stencil
  • Gina K Ink - Warm Cocoa Dark Chocolate, Soft Stone and a touch of Sea Glass
  • Gina K - Vertical Greetings & Things, and By The Sea 2 Stamp Sets
  • Gina K - Charcoal Brown Card Stock


Monday, March 23, 2020

A 50th Birthday Card

Another family member is turning 50, so a special card was needed!  Since I like foil and glitter, I decided to mix the two, using foil papers and glitter.


To make this card, I used the following:

  • Cuttlebug Happy Birthday Embossing Folder
  • Cricut Stretch Your Imagination 
  • Sizzix Sizzlets (Numbers)
  • Tim Holtz Kraft Core - Metallic Collection (Gold, Silver), Metallic Jewels (Black)
  • Sookwang Double Sided Tape
  • Glitter Ritz Micro-fine Glitter - Pink, Sea Green, Silver, Royal Blue, Poppy Orange, Lilac

To make the card, I embossed the Black Metallic card stock with the Happy Birthday Embossing Folder.  This was then added to the Silver Metallic panel.  Sookwang tape was added to a piece of white card stock.  This was then used to cut the balloons using the image from Stretch Your Imagination.  Two sizes were cut.  (Yep, I still have a Cricut Expression, and I use the cartridges).  The protective layer was removed from the tape, the glitter added and burnished in.  The balloons were added to the black embossed panel.  Using the Gold Metallic paper, the 50's were cut using the Sizzlets.  These were added around the balloons.  The entire panel was added to a card base to complete the card.


Friday, February 14, 2020

Valentines Day Card using Art Impressions

Art Impressions has some of the cutest, funny, and punny sentiments on their stamp sets.  For this card I used Valentine Critters and one of the sentiments for this Valentines Day card.

I used the following for the card:
  • Art Impressions - Valentine Critters Stamp Set
  • Gina K Designs - Small and Large Circle Dies
  • Hero Arts - Infinity Oval Dies
  • Tim Holtz - 3D Embossing Folder - Lumber
  • Gina K Designs - Black Onyx and Warm Chocolate Inks
  • Prismacolor Colored Pencils
To make the card, I cut the oval and circle out of white card stock.  The beaver was stamped in the circle and then colored with colored pencils.  The sentiment was stamped in the oval.  Both of these were then matted with brown card stock.  The background was embossed with the Lumber embossing folder, and then chocolate ink lightly added over the embossing to make the wood grain stand out a bit more.  The beaver and sentiment were added and the entire panel added to a red card base to complete the card.  

Monday, January 6, 2020

A Glittery Anniversary Card

I've needed a few more Anniversary cards in my stash of cards, so I tried a technique that was new to me, adding glitter over an inked image! Capturing the glitter on the cards was difficult, and the pictures just doesn't show how glittery the card it.


I used the following for the card:
  • Tim Holtz - Doily Stencil
  • Elizabeth Craft Designs - Warm Diamond Glitter
  • Ranger - Classic Cherry Die Ink
  • Versamark
  • Stampendous - Detail White Embossing Powder
  • Clearly Besotted - Tiny Type
  • Sookwang - Double Sided Tape
To make the card, the stencil was placed over a piece of white card stock and the Cherry Red ink was added using one of the Picket Fence Life Changing Brushes.  I then added the double sided tape to the image, and covered it with the glitter.  The image was then trimmed and matted with black card stock.  This was added to the card base.  The sentiment was stamped with Versamark, the white embossing powder added and heat set to complete the card.


Thursday, December 19, 2019

Snowman Christmas Card

When I made Christmas cards last year, I had a lot of extra parts.  I decided to use some of them this year.  This is one of the cards made with the leftovers (the snowman and the background).  Making this card was easy, since the hardest parts were done last year!


I used the following to make the card:

  • Tim Holtz - Holiday Knits Stamp
  • Distress Oxide Ink - Lucky Clover and Cracked Pistachio
  • Zing - Clear Embossing Power
  • Versmark
  • Stampendous - Detail White Embossing Powder
  • Copic Markers
  • Gina K - Snowone Like You Stamp Set
  • Lawn Fawn - Merry Messages Stamp Set
To make the card,  I stamped the background image with Versamark, added the clear embossing powder and heat set it.  The two green Distress Oxide inks were then added with the lighter color at the top of the panel, blending to the darker color.  The snowman was stamped and colored with various Copic markers, and then cut out with a circle die.  The background panel and snowman were both matted with green card stock.  The sentiment was stamped with Versmark, white embossing added and heat set.  The strip was cut to size and added to the panel along with the snowman to complete the card. 


Monday, December 2, 2019

Glittered Poinsettia

Several years ago, I got both the Poinsettia die and matching embossing folder.  I used it once.  I brought it out again this year to make these cards:


I used the following for the cards:

  • Tim Holtz - Tattered Poinsettia Die and Embossing Folder
  • Sookwang Double Sided tape
  • Glitter Ritz Microfine Glitter - Emerald Green, Champagne
  • Elizabeth Craft Designs - Bright Cranberry Microfine Glitter
  • Elizabeth Craft Designs - Stand-up Helpers dies
  • Star Form Peel-off stickers - Gold/Silver Lines (#7010), Circles (#7018) 
  • Mark Richards Peel-off stickers - Seasons Greetings sentiments

To make the Poinsettia, I added the Sookwang tape to white card stock, and then using the die cut out the layers of the Poinsettia.  The layers were then embossed, using the matching embossing folder.  I removed the protective sheet from the tape, added the glitter and burnished it.  The center of the Poinsettia needed a bit more definition, so some peel-off gold circles were added.  The Poinsettia was assembled using pop-dots between the layers.

To make the card base, I used a top fold A2 sized card (4.25 x 5.5).  I added an additional score line at 2.75" (top side of the card).  On the other side (bottom side of the card) at 2.75 inches from the fold, the stand up feature was added in the center of the card.

The Poinsettia was added a piece of patterned paper which was then matted with card stock in the same color as the card base.  Peel-off stickers were added to the panel which was then added to the bottom portion of the top side of the card.

Below the stand up helper, a piece of the patterned paper (1.75") was added.  Peel-off stickers were added to the top and bottom, and the sentiment added in the middle.  The excess portion of the bottom side of the card was removed.

Challenges: Simon Says Stamp Monday Challenge: Lets Sparkle

Monday, October 21, 2019

Fall Leaves Card

A while back I purchased the Gina K Leaves Foil-Mates from Gina K.  I had plans at the time to use it, but somehow didn't get around to it until now.  Its hard to photograph foil, but you can see a bit of it in the card below. 


I used the following for the card:
  • Gina K - Foil-Mates (Leaves)
  • Tim Holtz - Skeleton Leaves
  • Distress Oxide Ink - Carved Pumpkin, Mowed Lawn, Dried Marigold, Barn Door, Fossilized Amber
  • Heidi Swapp Minc Foil - Gold
  • Versamark
  • Stampendous Detailed Gold Embossing Powder
To make the card, I cut the Foil-Mate to 3.75 x 5.  To this I added the gold foil .  Using Life Saving Brushes I added and blended the Distress Oxide Inks.  The panel was matted with green card stock and added to the card base.  I then cut the leaves from brown card stock and added them to the card.  The sentiment was stamped in Versmark, gold embossing powder added ad heat set.  This was then added to the card.  


Monday, December 10, 2018

More quick Christmas Cards

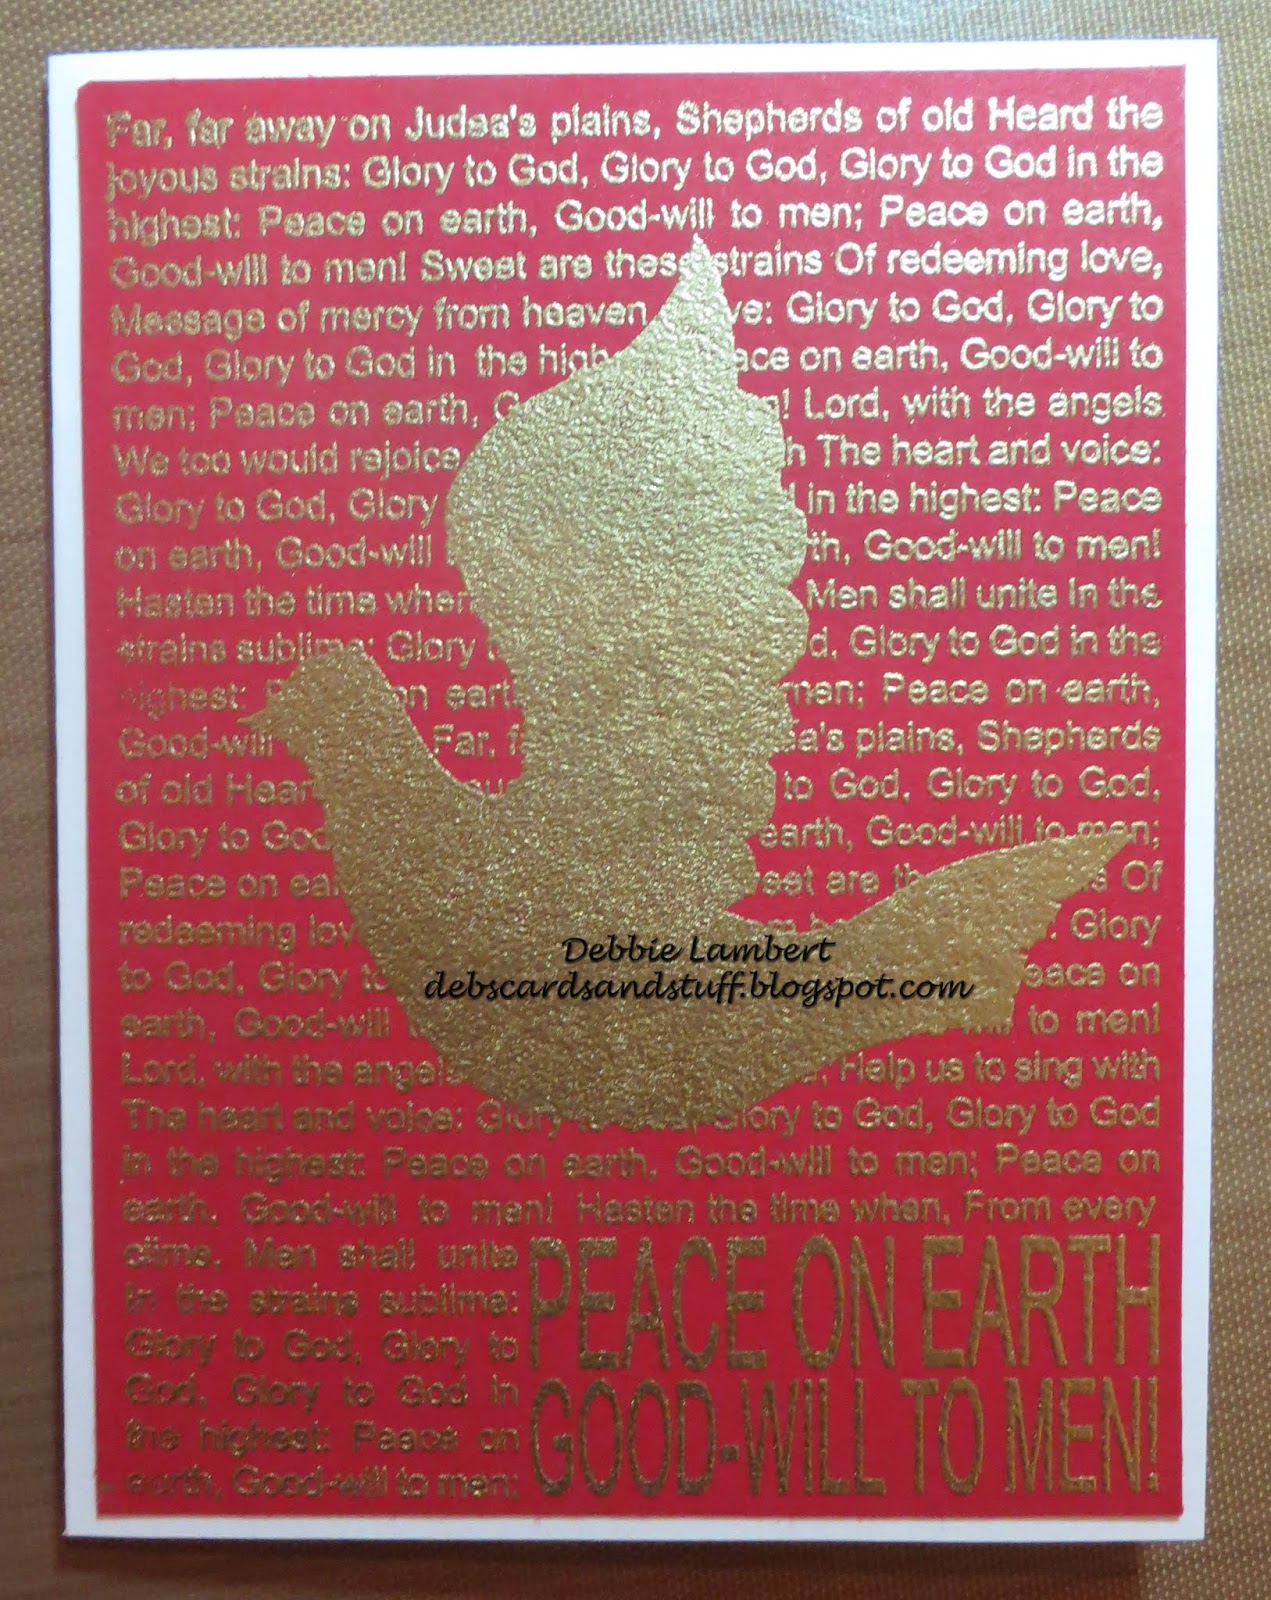
I wish I had more time to make Christmas Cards!  Instead, this year, I need quick cards.  Here are some more cards I made:


For the red card I used:

  • Versamark
  • Stampendous Detailed Gold Embossing Powder
  • Technique Junkies Peace On Earth Dove


For the Green Card:

  • Versamark
  • Stampendous Detailed Gold Embossing Powder
  • Tim Holtz Holiday Knits
  • Green Glitter Embossing Powder
  • Gina K Simple Snowflakes (for sentiment)

For both cards, I stamped the background with Versmark, added the Embossing Powder and heat set it.  Both were cut to 4 x 5.25 and added to a card base.  For the green card, the sentiment was stamped with Versamark, heat set and added to the card with pop dots.

Monday, February 26, 2018

GIna K Sending Love

Gina K has some of the beat flower stamps!  Here is a card I made with one of them:

To make this card, I used the following:

  • Gina K - Sending Love Stamp set
  • Prismacolor Pencils
  • Tim Holtz Celebrate Dies
  • Versfine Black Onyx Ink

To make this card, I stamped the corner image at both the top left and bottom right of a 4 x 5.25 piece of white card stock.  The image was then colored with Prismacolor pencils.  From closely matching color card stock, I cut the happy birthday sentiment using the Celebrate dies.  These were then added to the center area of the image.  The image was then added to a card base to complete the card,

Monday, December 11, 2017

Foiling with Stencils

I like the look of foil on cards, and using a stencil is a great way to add foil.  Here are some Christmas cards made with a stencil:


A close-up look at each card:


To make these cards, I used the following:
  • Heidi Swapp Minc Foil Red and Green
  • Gina K - Let it Snow Stamp Set
  • Memento Brilliance - Platinum Planet Ink
  • Deco Foil Transfer Gel
  • Tim Holtz - Holiday Script Stencil

To make the card, I first stamped snowflakes (from the Gina K Let it Snow Stamp Set) with Platinum Planet ink, all over the card stock.  I then placed the stencil over the stamped snowflakes, and added the Transfer Gel.  The stencil was removed, and once the gel was dry, the image foiled with either the Red or Green foil.  The entire image was cut down and added to the card base to complete the card.

Monday, November 27, 2017

Deco Foil and Tim Holtz Christmas Card

I love the look of foil on cards.  I saw a similar card on a Gina K Youtube video (see it here), and decided to try it myself.  I have two different pictures of the same card, with different lighting in an attempt to show the foil (which does not photograph well!):


I used the following to make the card:

  • Deco Foil Transfer Gel
  • XpressIt Foil Deco Tape
  • Tim Holtz Festive Stencil
  • Deco Foil Emerald Watercolor
  • Neenah Smooth Desert Storm card stock
To make the card, I placed the stencil over the card stock and covered the area with a thin layer of the Deco Foil Transfer Gel.  The stencil was removed and the gel allowed to set until clear.  The foil was added using a laminator.  The panel was then trimmed to size and added to the card base.  The Deco tape was added to the edge of the panel to complete the card.


Monday, November 20, 2017

Styled Woodland Christmas Cards

I took a class a few years ago, where we made a card similar to this one, since I had the stamps and stencil, I decided to make a few of these for Christmas this year.


I used the following to make the card:

  • Tim Holtz Holiday Knit Stencil
  • Tim Holtz Styled Woodlands Stamp set
  • Various Distress Markers
  • Distress Ink - Tea Dye
  • Ribbon
To make the card, I colored one of the wreath stamps with the Distress Markers.  The stamp was then spritzed with water, and stamped on a piece of watercolor paper.  The stencil was then placed over the image and distress ink added.  The sentiment was added to the middle of the wreath. The panel was then cut to size, ribbon added and added to the card base to complete the card.

Monday, October 23, 2017

Happy Birthday with Altenew Pattern Play - Hexagons

The Altenew Pattern Play Hexagons was one of the stamps I knew I had to have when I first saw it.  Here is a card I made with it:


I used the following to make the card:
  • Altenew Pattern Play - Hexagons Stamp Set
  • MFT Black Hybrid Ink
  • Lawn Fawndamentals Deep Sea and Mermaid Ink
  • Ranger Dye Ink - Caribbean Coast
  • Memento - Teal Zeal
  • Tim Holtz - Celebrate Dies
  • Pssst Shimmer Spray - Sparkle
To make the card, I stamped the outline Hexagon image with the Black Hybrid Ink.  I then used the various blue inks and stamped the individual hexagons.  The entire image was then spritzed with the Pssst Shimmer Spray to add a bit of shimmer.  Happy Birthday was then cut out from the main image with the TIm Holtz Celebrate dies.  The image was then added to a card base to complete the card.

Monday, August 28, 2017

Tim Holtz Mini Doodle Greetings and Northwood Rubber Stamps Christmas Card

Here is my first Christmas Card I've made for this year.  I used two of my favorite stamps for this card - one by Tim Holtz, the other by Northwoods Rubber Stamps.


I used the following to make the card:
  • Northwoods Rubber Stamps - Snowman and Bird
  • Tim Holtz - Mini Doodle Greetings
  • Versamark
  • Stampendous - Detailed White Embossing Powder
  • Copic Markers
  • Wink of Stella - Clear
  • Memento Tuxedo Black Ink
To make this card, I stamped the Snowman with the Memento Ink.  This was then colored with various Copic Markers.  I used Wink of Stella for the snowman to give it a bit of shimmer.  The image was trimmed down and added a dark blue panel.  The sentiment is from the Tim Holtz Mini Doodle Greetings stamp set.  I stamped this with Versamark, and then added the embossing powder and heat set.  The panel was then added to the card base to complete the card.