Pages

Showing posts with label Prismacolor. Show all posts

Saturday, August 5, 2023

A Gardeners Birthday Card

Here is a birthday card for a Gardener.


The following was used to make the card:

  • Gina K Designs - Black Onyx, Wild Dandelion, Sweet Mango Ink
  • Gina K Designs - Laster Layouts 6 and 7
  • Gina K Designs - Sweet Spring stamps and Dies
  • Gina K Designs - Birthday Cheer Mini stamps
  • Gina K Designs - Sea, Sun and Sky Stencil
  • Prismacolor Pencils
To make the card, the card base was created with white card stock.  The sun was stenciled on a piece of white paper and cut with Master Layouts 7.  The associated black mat was cut from ML 7 and added to the card base.  The sun panel was then added.  The grass was cut from green card stock using Master Layouts 6 and added to the sun panel.  The wheel barrel was stamped and die cut using the associated die.  The wheel barrel was colored with Prismacolor pencils and added to the card.  The sentiment was stamped to complete the card.

Saturday, July 29, 2023

Vintage Bicycle Card

The Vintage Summer kit from Gina K Designs has images that make wonderful Vintage style cards.  The frames in Master Layouts 12 add an additional vintage look to cards.


I used the following for the card:

  • Black and White card stock
  • Gina K Designs - Master Layouts 12
  • Gina K Designs - Vintage Summer stamps and dies
  • Gina K Designs - Black Onyx Ink
  • Prismacolor Pencils in a variety of colors
To make the card, the card base was created with white card stock.  A piece of black card stock was trimmed to a smaller size than the card base and added to it.  The frame was cut using one of the dies from Master Layouts 12 and added to the card.  The Bicycle image was stamped with Black Onyx ink and then cut using the associated die.  The image was colored with Prismacolor pencils and added to the card  base to complete the card.

Monday, January 16, 2023

Happy Birthday with Northwoods Rubber Stamps

 I love the designs from Northwoods Rubber Stamps!  I used the Spring Water Pump to make a  birthday card. I chose the colors for this card by using the Color Cube.  I decided to randomly select a card and try to use it for the entire image.  The first card I chose didn't have enough colors for the flowers, so I picked one more containing a color on found on the first card. The second picture shows the cards I selected for this image. The Color Cube combinations helped so much in selecting colors that would work together.


I used the following for the card:
  • Prismacolor Pencils
  • Color Cube (to select colors)
  • Gina K Designs - Black Onyx Ink
  • Hero Arts - Infinity Dies - Oval
  • Northwoods Rubber Stamps- Spring Truck and Spring Water Pump set
  • Clearly Besotted - Tiny Type
To make the card, the image was stamped in black, then colored with Prismacolor pencils. Once complete, a mat was cut using the oval die, and added to the image.  This entire piece was matted using black and added to the card base.  The sentiment was stamped to complete the card.


Monday, September 12, 2022

Birdhouses from Northwoods Rubber Stamps

I finally figured out how to use the small birdhouse stamps from Northwoods Rubber Stamps.  Three of them fit perfectly on a mini slimline card!

I use the following for the card:

  • Northwoods Rubber Stamps - Round Birdhouse in Circle C10011, Wood Birdhouse in Circle C10012, Chickadee Birdhouse in Circle C10013
  • Gina K - Summer Silhouettes stamp set (for the sentiment)
  • Memento - Cottage Ivy Ink
  • Gina K - Master Layouts 7
  • Gina K - Applemint and Obsidian Ink
  • Gina K - Petite Flourish Background Stamp
  • Prismacolor Color Pencils
To make the card, the birdhouses were stamped using Obsidian ink.  These were then colored using Prismacolor Pencils.  A mat was cut for the images using green card stock.  The background was stamped using the Petite Flourish Background stamp and Applemint ink.  This was then cut with the smallest of the rectangles from Master Layouts 7.  The circles were cut using the largest circle die from Master Layouts 7.  The birdhouse images were added and the sentiment stamped to complete the card.

Monday, August 8, 2022

Rosy Birthday Card

I had want to make some Distress Oxide backgrounds, I made several, but because of stamping errors, this was the only one that made it to become a card!


To make the card, I used:

  • Versafine - Black Onyx Ink
  • Distress Oxide - Squeezed Lemonade, Carved Pumpkin, Kitsch Flamingo
  • Prismacolor Pencils - Red and Green
  • Gina K Designs - Master Layouts 2 
  • Gina K Designs - Summer Silhouettes stamp set
  • Gina K Designs - Wild Roses stamp set
  • Gina K Designs - Soft White Pearl Mix
To make the card, I first created the background, blending the 3 colors of Distress ink.  Using Versafine ink, the rose image and the sentiments were stamped.  Using just 2 colored pencils - red and green - the rose image was colored.  The panel (and associated black mat) was cut using Master Layouts 2.  The panel was attached to the mat, and the entire piece to the card base.  3 small pearls were added under the sentiment to complete the card.

Monday, November 8, 2021

Happy Birthday card with Hero Arts and Picket Fence Studios

This birthday card did not come out exactly as planned but I really like the end result.  The original plan was to stamp the sentiment on velum and fussy cut it - but I could not cut it to my liking.  So this card is the "new plan".  Where I covered the entire panel with the stamped velum! 


I used the following for the card:
  • Hero Arts - Candles Bold Prints
  • Hero Arts - Unicorn White Pigment Ink
  • Prismacolor  Colored Pencils
  • Picket Fence Studios - Happy Happy Happy Birthday Stamp
  • Versamark
  • Stampendous Detailed White Embossing Powder
To make the card, I stamped the Candles on a piece of dark blue paper with the white pigment ink.  Once the ink was dry, I colored the candles with Prismacolor pencils.  Apiece of velum was stamped with Versamark, embossing powder added, and heat set.  This was added to the main panel along one side only.  The entire piece was then added to a card base to complete the card.

Monday, July 12, 2021

Sailboat Window View

 I gave this card to my Husband for Father's Day, but it could be used for a Birthday card as well.  

For the card, I used:

  • Gina K - By the Sea 2
  • Simon Says Stamp - Waves Stencil
  • Distress Ink - Stormy Sky, Tumbled Glass, Mermaid Lagoon, Squeezed Lemonade
  • Memory Box - Grand Madison Arched Window
  • Acetate
  • Prismacolor Colored Pencils
To make the card. I cut the window twice, once from a wood grained brown card stock, and once from a wood grained yellow card stock.  I then pieced the brown window frame into the yellow paper, and attached it using a little bit of tape.  Acetate was added to the window. Using the stencil and the blue distress inks, the water was created on a piece of white card stock.  I then created the sun with a blending brush.  The sailboat was stamped on white card stock, and colored with colored pencils.  It was fussy cut and added to the background piece. Foam tape was used to attach the background to the window.  This was then added to the card base to complete the card.

Challenges:
Simon Says Stamp Monday Challenge  - Lazy Days Of Summer

Thursday, November 12, 2020

Vanilla Arts Nevermore Manor Halloween Cards

 I took another fun Vanilla Arts class, Nevermore Manor.  And here is my completed image:


I thought that the image would make great Halloween cards, so I scanned the image, cropped it, and lightened it (the original was too dark when printed). These were matted and added to the card bases to complete the cards.  


Friday, February 14, 2020

Valentines Day Card using Art Impressions

Art Impressions has some of the cutest, funny, and punny sentiments on their stamp sets.  For this card I used Valentine Critters and one of the sentiments for this Valentines Day card.

I used the following for the card:
  • Art Impressions - Valentine Critters Stamp Set
  • Gina K Designs - Small and Large Circle Dies
  • Hero Arts - Infinity Oval Dies
  • Tim Holtz - 3D Embossing Folder - Lumber
  • Gina K Designs - Black Onyx and Warm Chocolate Inks
  • Prismacolor Colored Pencils
To make the card, I cut the oval and circle out of white card stock.  The beaver was stamped in the circle and then colored with colored pencils.  The sentiment was stamped in the oval.  Both of these were then matted with brown card stock.  The background was embossed with the Lumber embossing folder, and then chocolate ink lightly added over the embossing to make the wood grain stand out a bit more.  The beaver and sentiment were added and the entire panel added to a red card base to complete the card.  

Monday, November 18, 2019

Vanilla Arts - Flutterby

I really like how this one came out!  I can see doing this with other colors, perhaps to match the butterflies in my yard!

The size of this one is 8x11.5 - a full sheet. I'll be printing this at a small size to see how it would work as a card.


Monday, November 11, 2019

Elements of Nature Class - Kit and Clowder

A while back I signed up for the Elements of Nature class through Kit and Clowder.  Now that I am retired, I have time to work on this class.  I had originally planned on doing the class in colored pencil, but now that I have more time, I am doing the class in both Copic and colored pencil.  I'm currently using Prismacolor Pencils, but will be doing some of the future lessons with Polychromos.  In the pictures below, the Copic version is on the right, and the colored pencil version on the left.


Monday, November 4, 2019

Vanilla Arts - Sakura Blossoms

After struggling with the Jelly Beans, I needed to try something that I was more comfortable with, and that was the Sakura Blossoms class from Vanilla Arts.  This one came out great!


I was very pleased with the result, and plan on using the scanned copy of the image on cards.  I think that it will make a great birthday or anniversary card.

Monday, October 28, 2019

You've got mail - Fall Card

When I saw this stamp from Taylored Expressions, I knew I had to have it!  Of course it took me a year or two before I used it to make a card! 


I used the following for the card:

  • Ink on 3 Fadeout Ink
  • Impression Obsession - Wooden Plank Stamp
  • Taylored Expressions - You've Got Mail - Fall Stamp
  • Gina K designs Large and Small Rectangle Dies
  • Hero Arts - Sandstone Ink
  • Prismacolor Pencils
To make the card, I stamped the mailbox image on Kraft card stock with Fadeout Ink.  I then colored the image with Prismacolor Pencils. The image was then cut out with one of the large rectangle dies.  A slightly larger rectangle was cut out from a dark green card stock and the image was attached to the green rectangle.  The front of a dark orange card base was stamped with the Wooden Plank stamp.  The mailbox image was then to the card base to complete the card


Monday, October 7, 2019

Vanilla Arts - Scarlet Geranium and a card!

My grandparents grew geraniums in window boxes.  When I saw this class, it immediately reminded me of the geraniums they grew.  I knew I had to tackle at least one more Vanilla Arts class.

This was an interesting one to photograph/scan.  The flowers actually changed color depending on the lighting and the photos were different than the scan!  I am still trying to get an accurate picture! The third picture is the most accurate. The first,  taken with additional indoor lighting.  The second picture has no additional lighting (very orange), the third is a photo taken outside, the fourth picture is a scan of the original (which I used to make a card).

I had planned on spending time with my dad on his 80th birthday, the plane tickets were bought, the suitcases packed, and then my husband ended up in the hospital, so I had to re-schedule my trip, and have been calling it his "unbirthday".   So a card was in order!  I used a scanned copy to make an his  "unbirthday" card.  (and yes it was his parents the grew the geraniums)


Monday, September 23, 2019

Vanilla Arts - Jelly Beans

When I first saw this class from Vanilla Arts, I had to take it, since I love Jelly Belly jelly beans, and it reminded me of a great big pile of Jelly Belly's!  I didn't realize how hard this one would be, since they are jelly beans.  This one was a real stretch for me, and one which I will need to do again, once I have some more experience.  Here is how it came out for me:


Monday, September 9, 2019

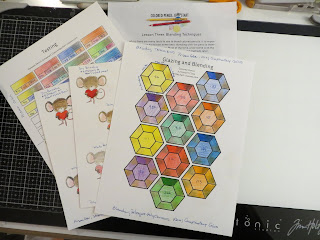
Color Pencil Jumpstart Class

You would think that colored pencil should be easy - right?  Not for me, so I took the on-line class Color Pencil Jumpstart from Sandy Allnock.  This class help me find were I was having a problem (it's the pressure I use).   There were several techniques taught as well.  I now know how to color on dark colored card stock, vellum, use colored pencils like watercolor, and use pencil powder. Here are the samples from each of the lessons.


Monday, February 4, 2019

Northwoods Rubber Stamps Flower Cards

Quite a while back I stamped and colored several Flowers from Northwoods Rubber Stamps.  I had struggled to figure out how to use them, and they were on my desk for a while.  I finally decided how to use them, and here are the cards I made:


I used the following to make the cards:

  • Northwoods Rubber Stamps - Cosmos, Gerber and Bachelor Button Stamps
  • Various Copic Markers
  • Various Prismacolor Pencils

Saturday, January 12, 2019

Cool Peppermint (Vanilla Arts)

I really like the classes from Amy Shulke at Vanilla Arts.  I like using both Copic markers and colored pencils together.  Here is the latest one I've completed Cool Peppermint:

Monday, October 1, 2018

A Pumpkin Halloween Card

For this Halloween card, I used a variety of supplies, and also tried a comparison of my Prismacolor and Faber-Castell Polychromos pencils.  One card was done with the Prismacolor pencils, the other with the Faber-Castell.  Overall, to me the pencils are similar, but I liked the feel of the Polychromos better.  They just seemed to be smoother.

Here are the cards:

Faber-Castell Version:
 Prismacolor Version:

I used the following for the cards:
Gina K - Sweet Mango Foil
Deco Foil - Pumpkin Patch Clear Toner Sheets
Simon Says Stamp - Stitched Rectangles
Hero Arts Infinity Dies - Oval
Prismacolor Pencils
Faber-Castell Polychromos Pencils
Gina K Amalgam Ink
Hampton Art - Halloween Stamp

To make the card, I stamped the image on white card stock with the Gina K amalgam ink and colored with the colored pencils (either Prismacolor or Faber-Castell).  The image cut with the oval dies, and a second oval, slightly larger was also cut as a mat.  I foiled the clear toner sheet.  A rectangle frame was cut with the Stitched Rectangle dies.  The foiled image was cut to fit the black frame, and added to the frame.  The stamped pumpkins were added on top of the foiled image.  This was them added to the card base.

Monday, September 3, 2018

Another Vanilla Arts Class - Candlelight

The first class I took from Vanilla Arts (https://www.vanillaarts.com/online-learning/), was Candlelight.  I actually did this one twice, since for the first one, I didn't have the suggested paper, I didn't have all of the Copic Markers, and the most important, I was not happy with the candle.   For the second one, I did use the suggest paper, and had purchased the Copic Markers. I like it better, but still had problems with the candle.  Perhaps I need to try it one more time!


First try
Second Try